e-Invoice payment is perfect for merchants who do not have an e-commerce website and prefer to send e-invoices to their customers instead of payment links.
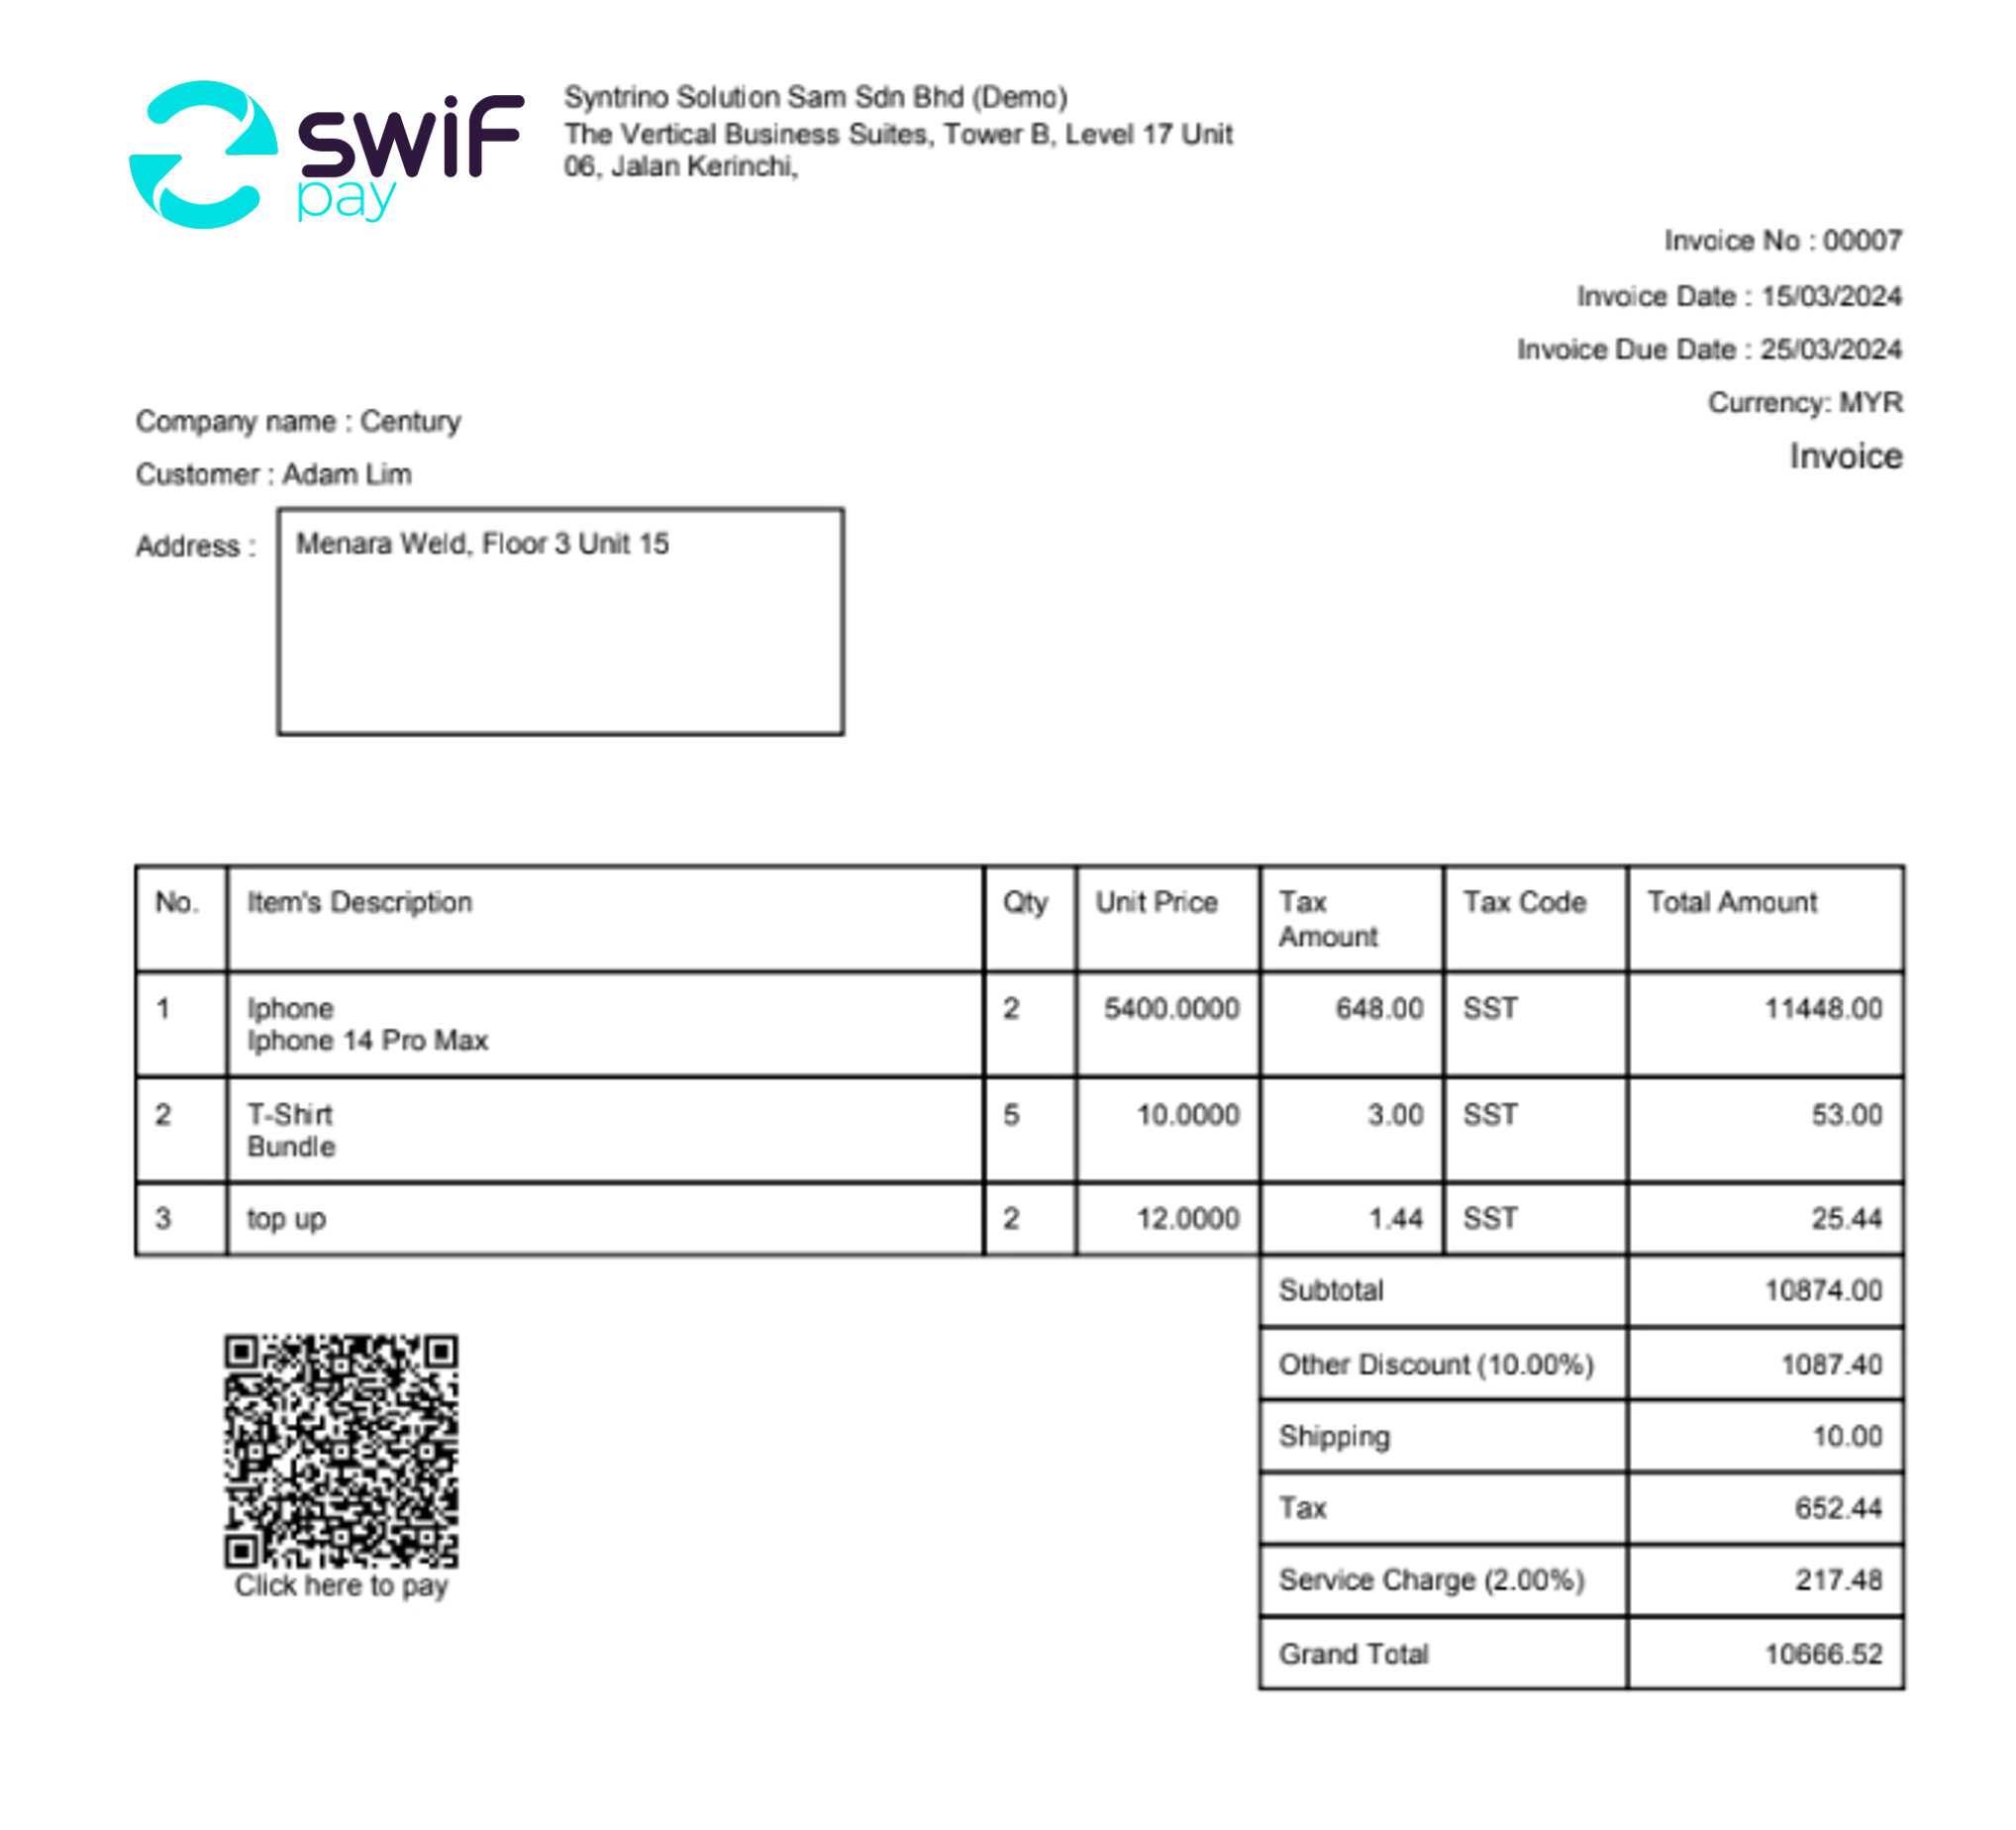
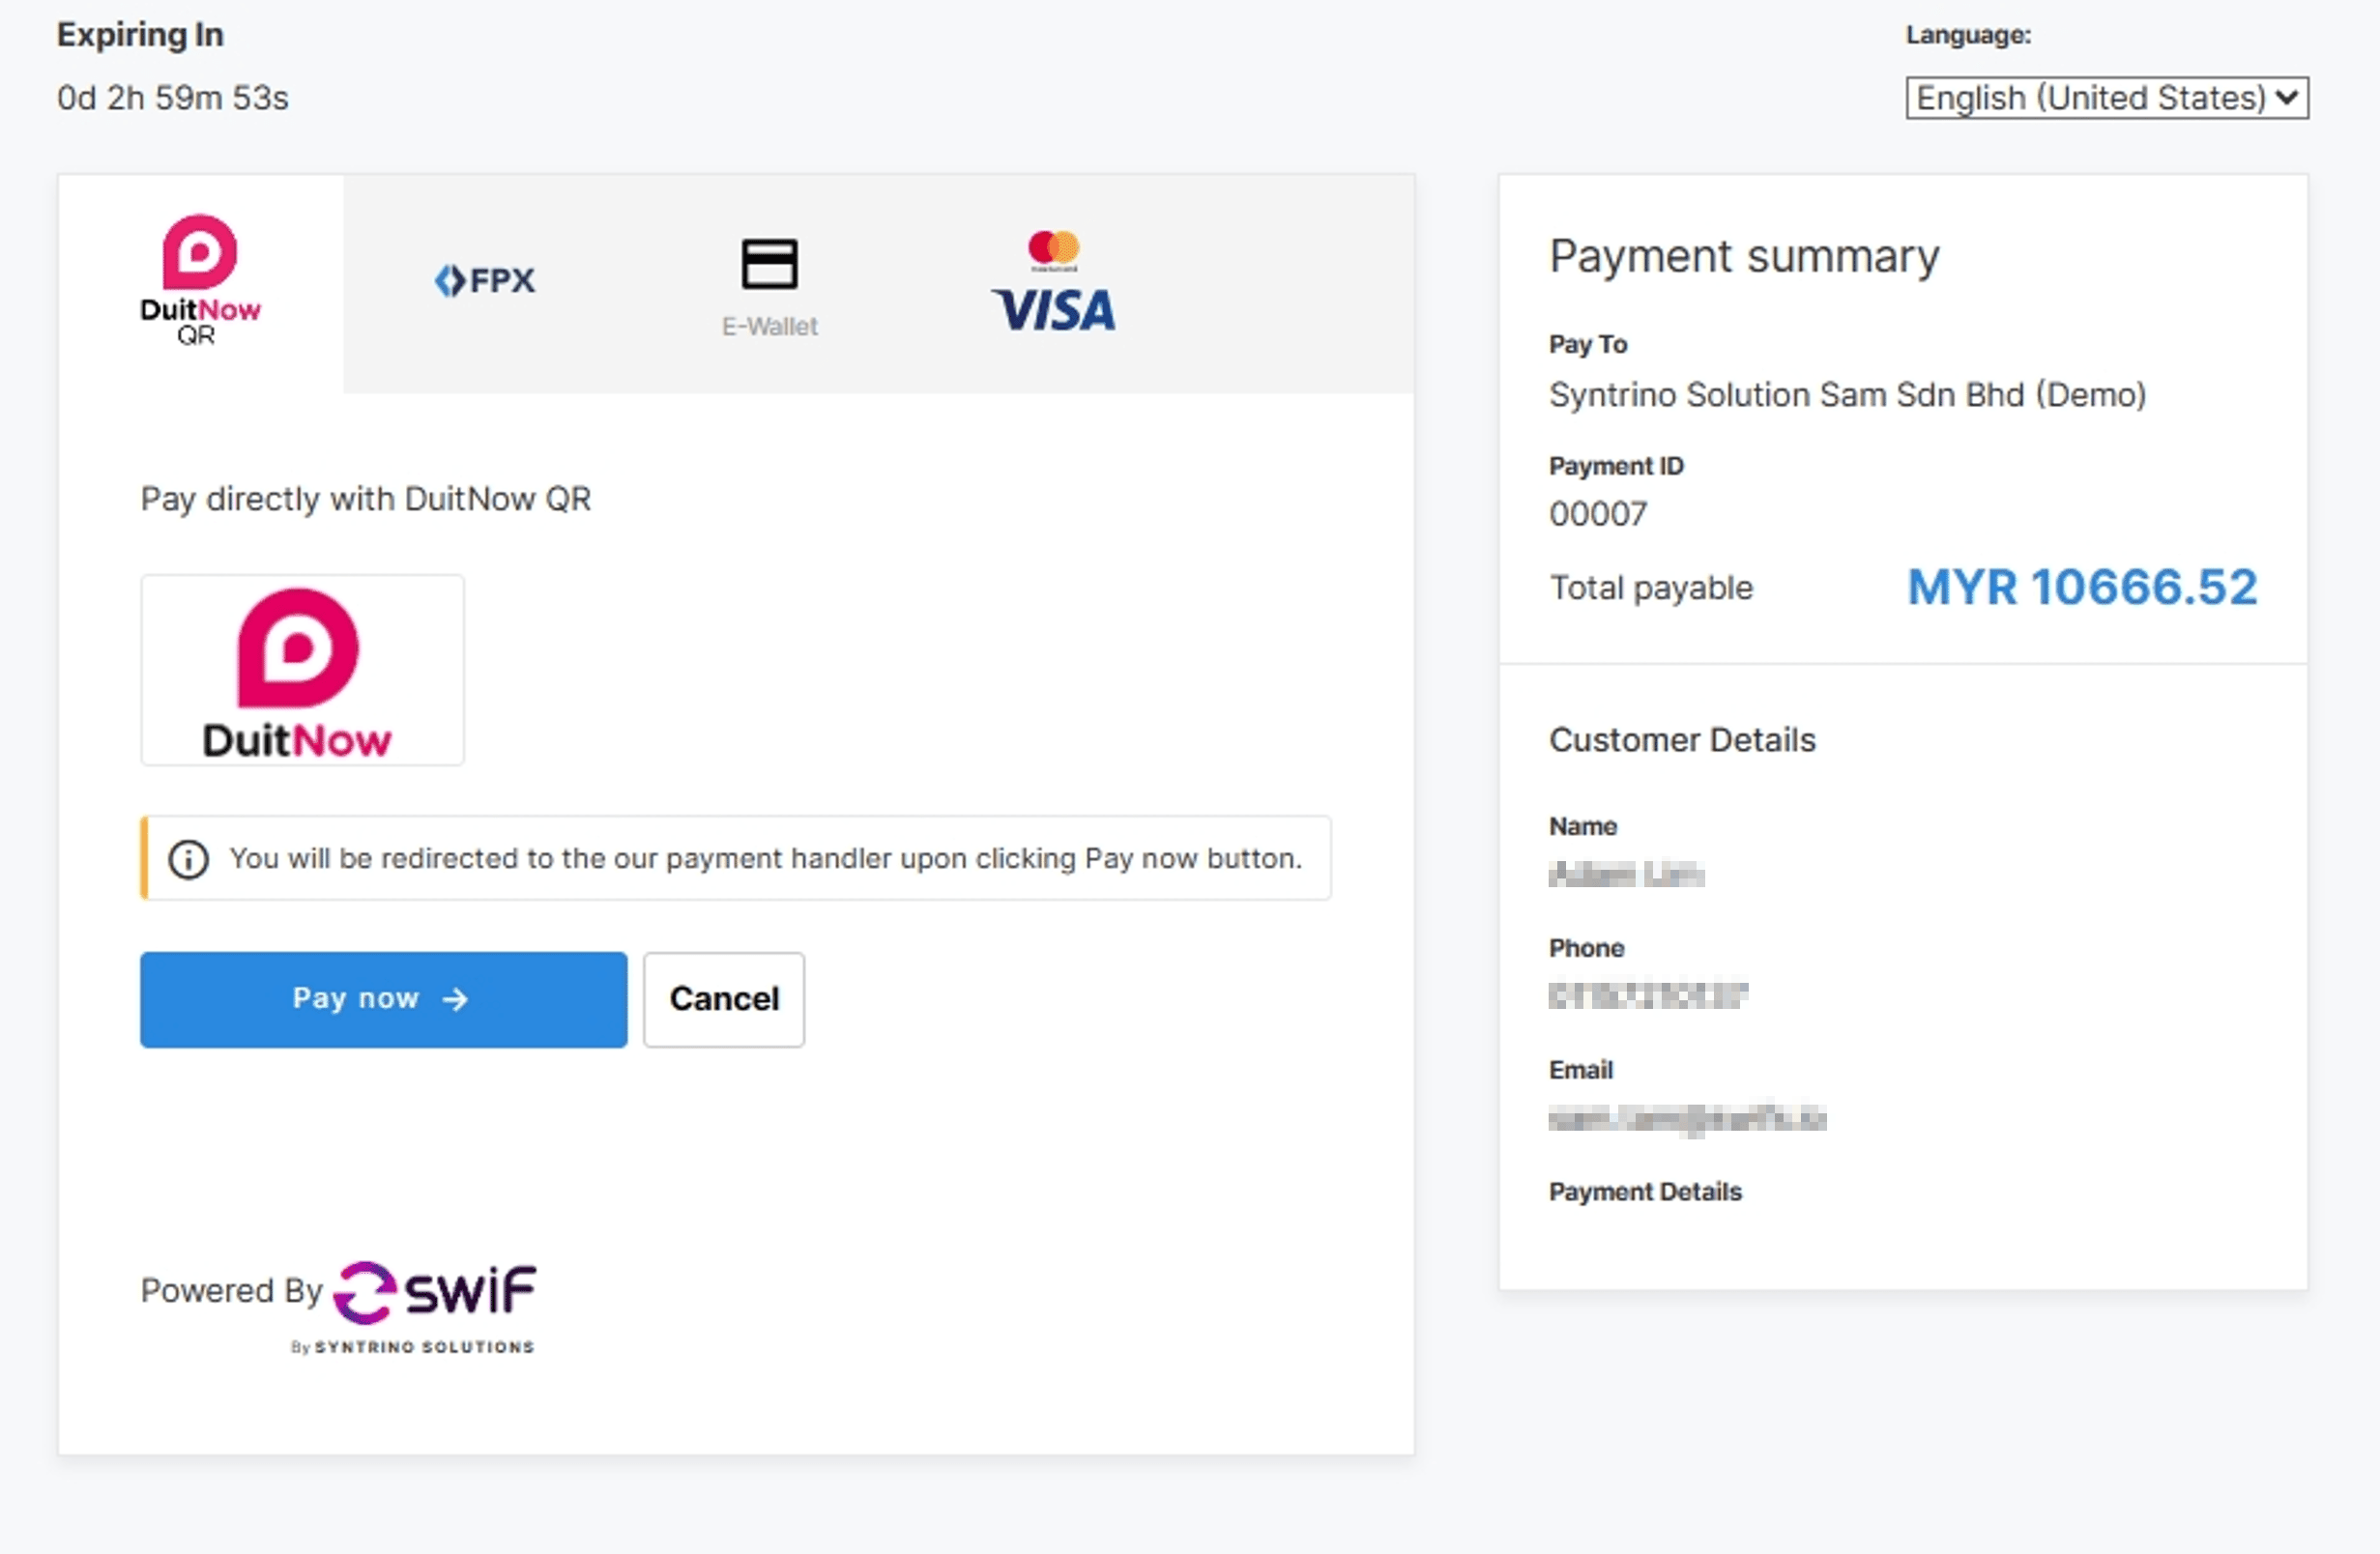
With e-invoice payment, merchants can provide complete invoices containing product details. Customers can conveniently settle their payments by either clicking on the ‘Click here to Pay’ button or scanning a QR code.
The key difference between e-invoice payment and payment links lies in their presentation: e-invoice payment integrates the payment functionality directly into the invoice, eliminating the need for a separate payment link. This streamlines the payment process for both merchants and customers. Whereas payment links require a separate invoice upload which some companies may still prefer as part of their internal processes.
Benefits of e-invoice payment:
- Pre-set invoicing schedule
- Set invoice due date
- Set auto reminders
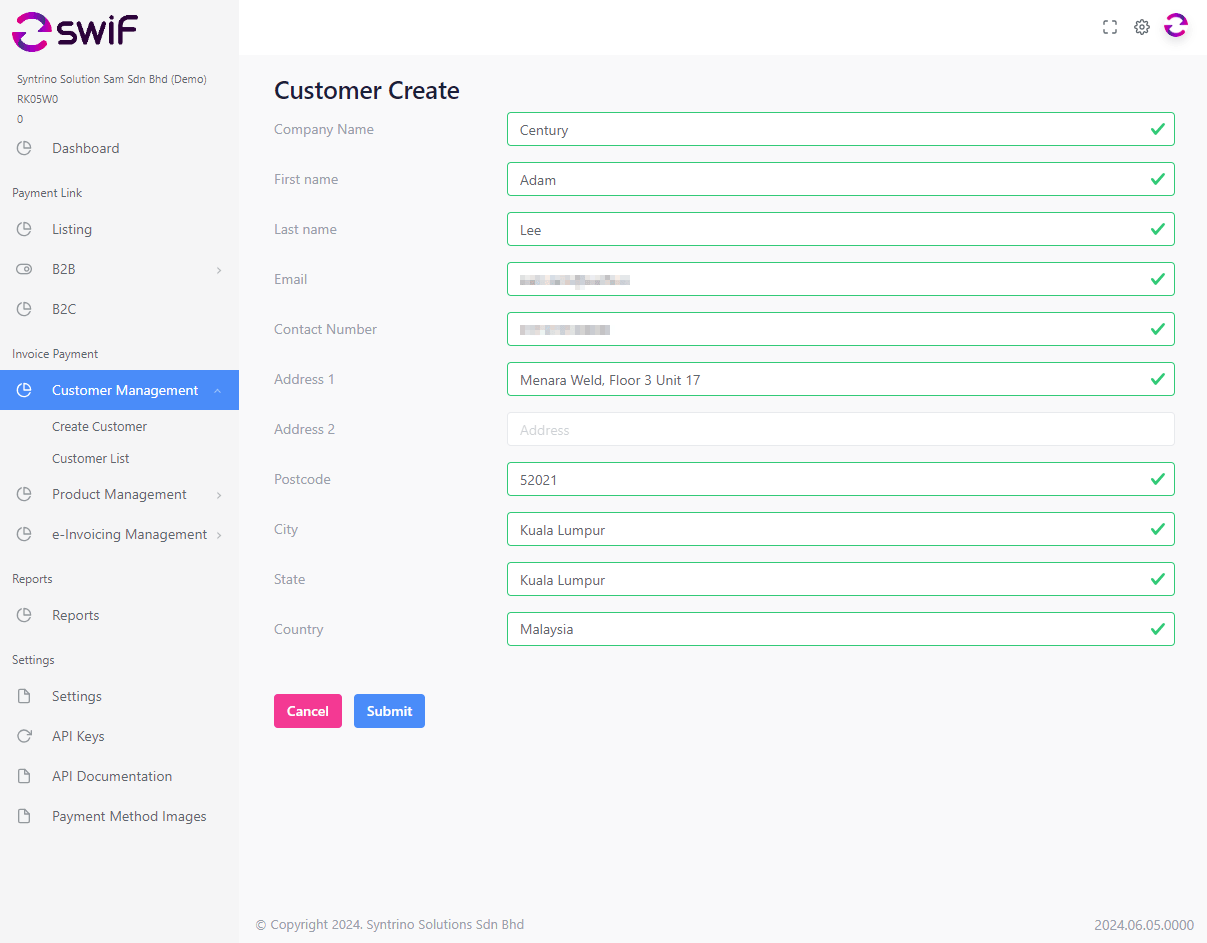
Create Your Customer List
To create your e-invoice you first need to create your list of customers.
Under ‘Invoice Payment,’ Customer Management’:
Create Customer. Key in details and submit.
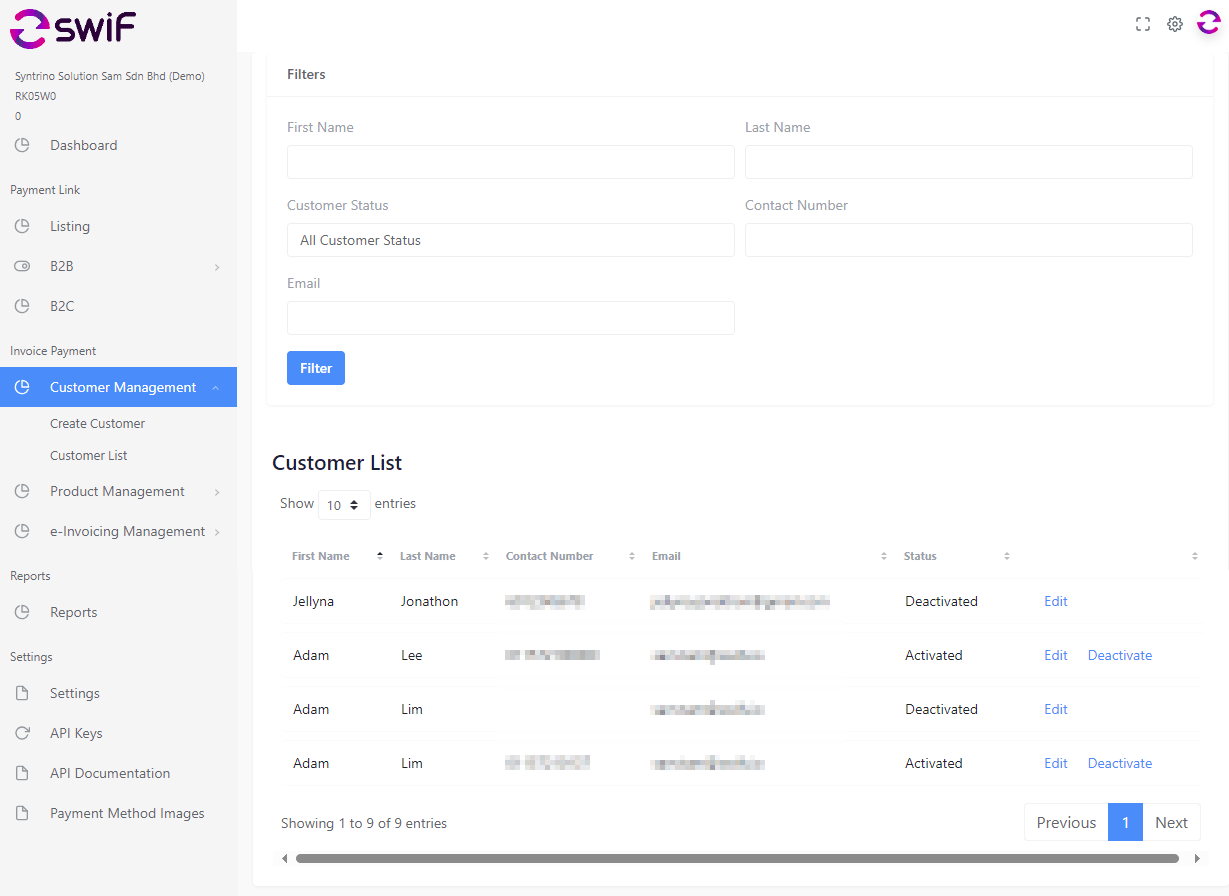
Go to ‘Customer List’ to access all.
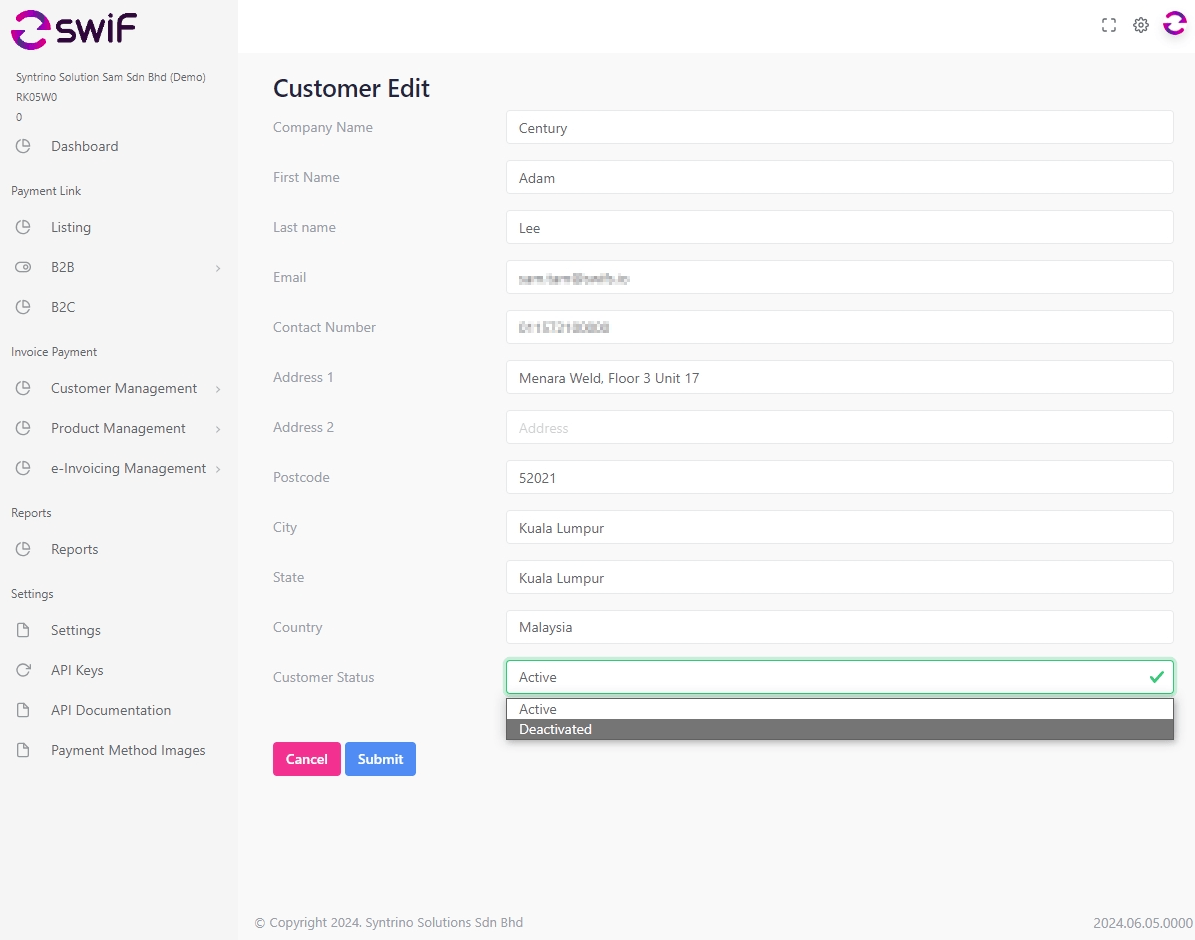
From here you can edit and/or deactivate customers.
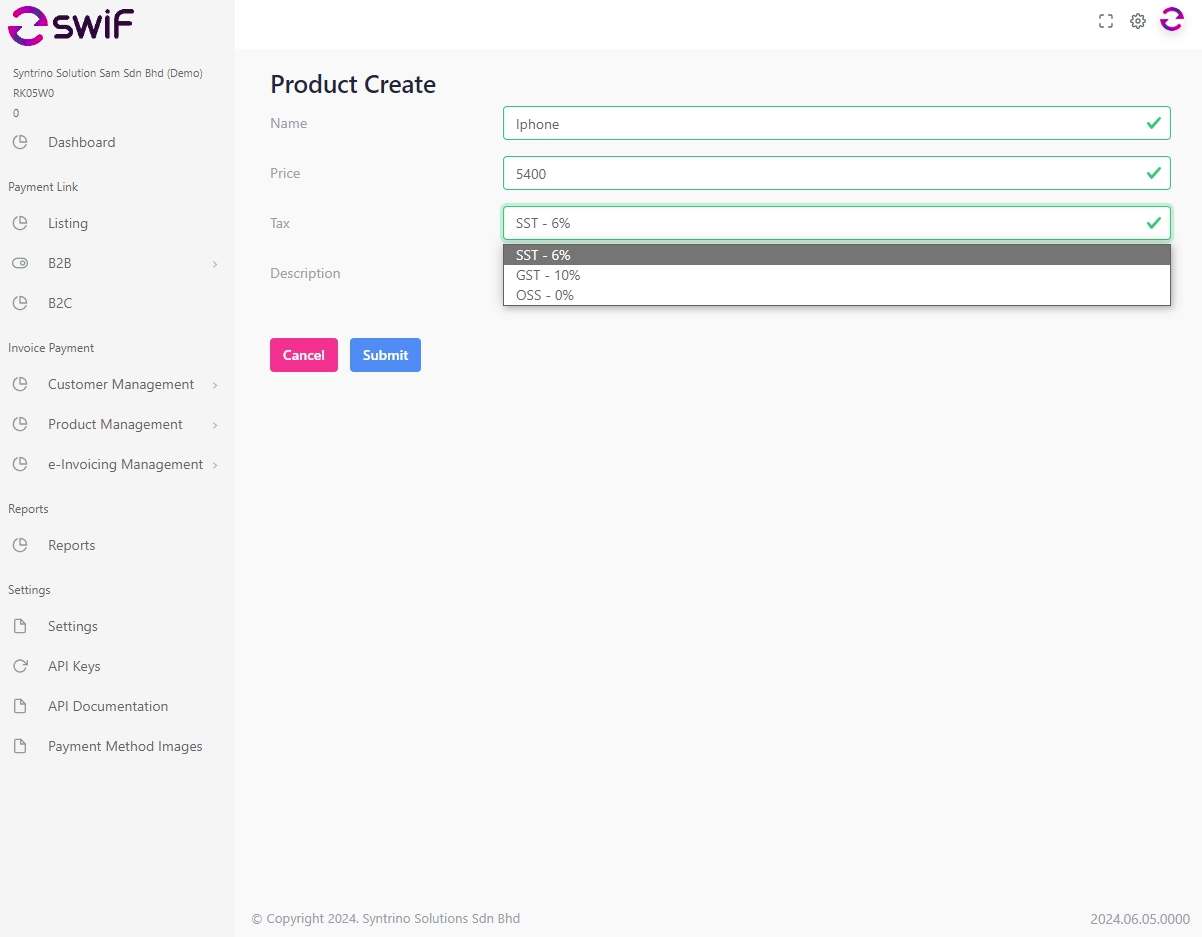
Create Your Product List
Once the list of customers is created, you need to create your list of products for sale.
Under ‘Product Management,’ click ‘Create New Product’ and submit.
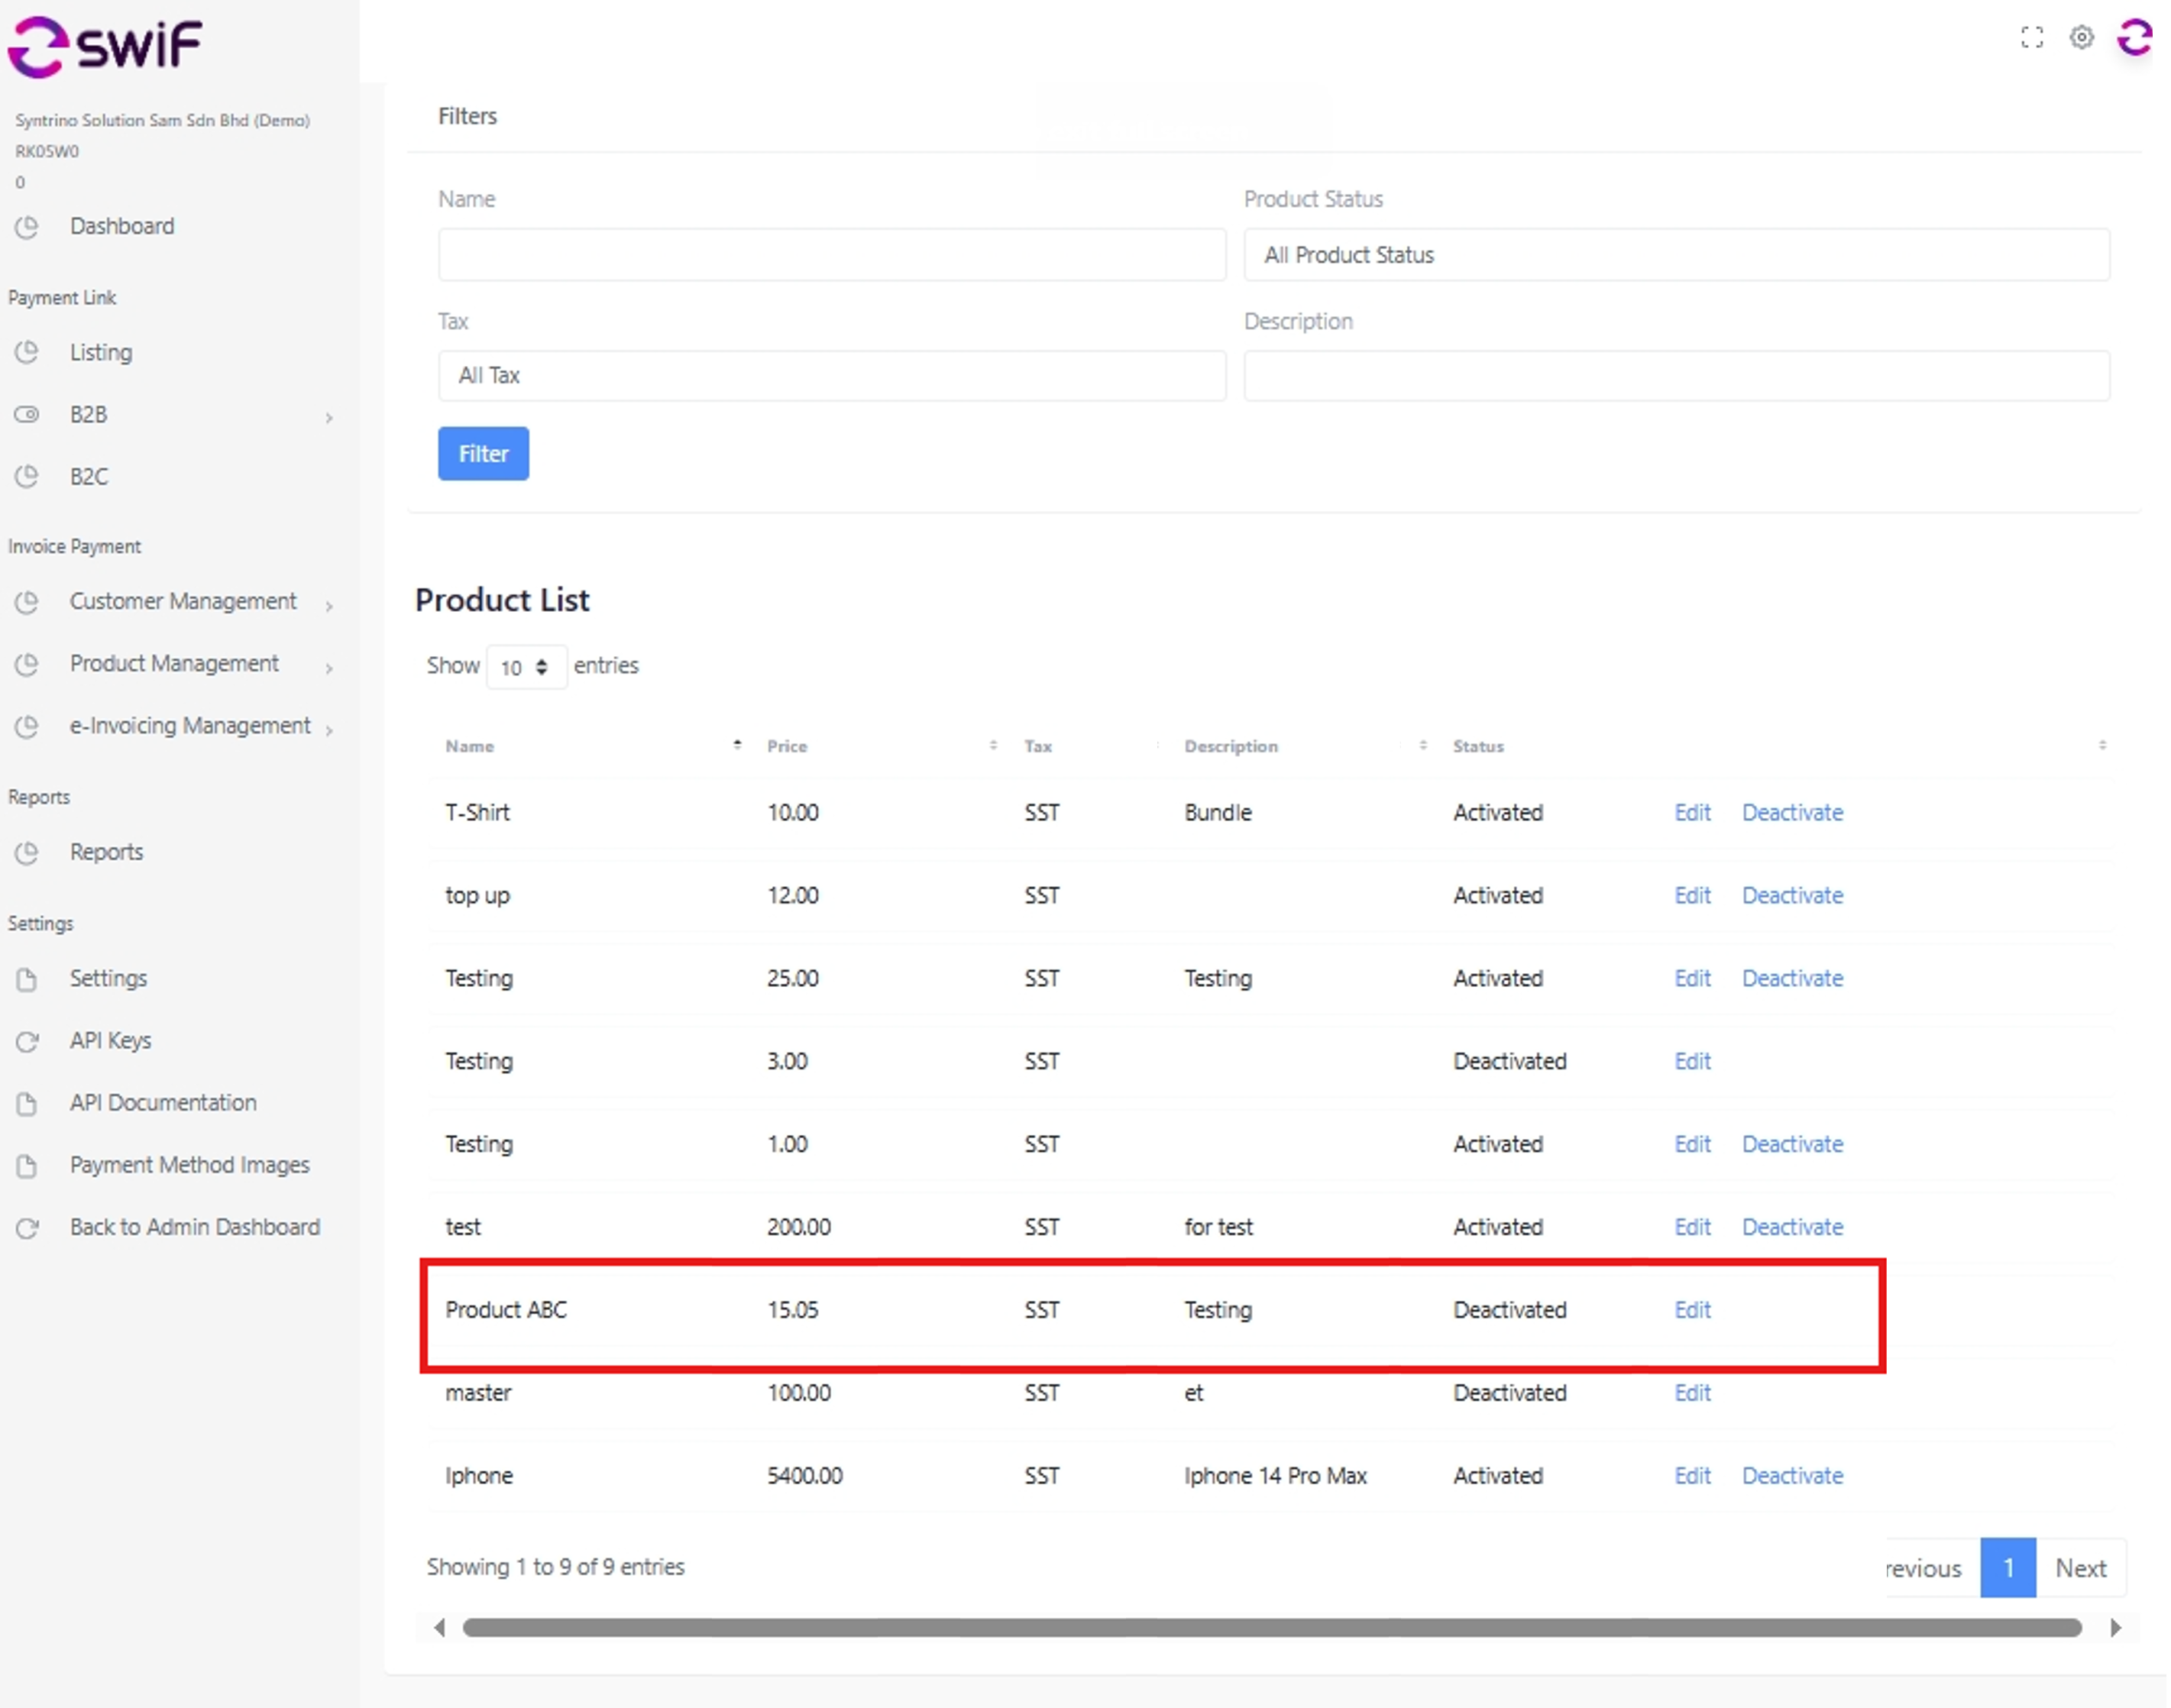
Under ‘Product Management’, view ‘Product List’ and filter by product status – activated or deactivated.
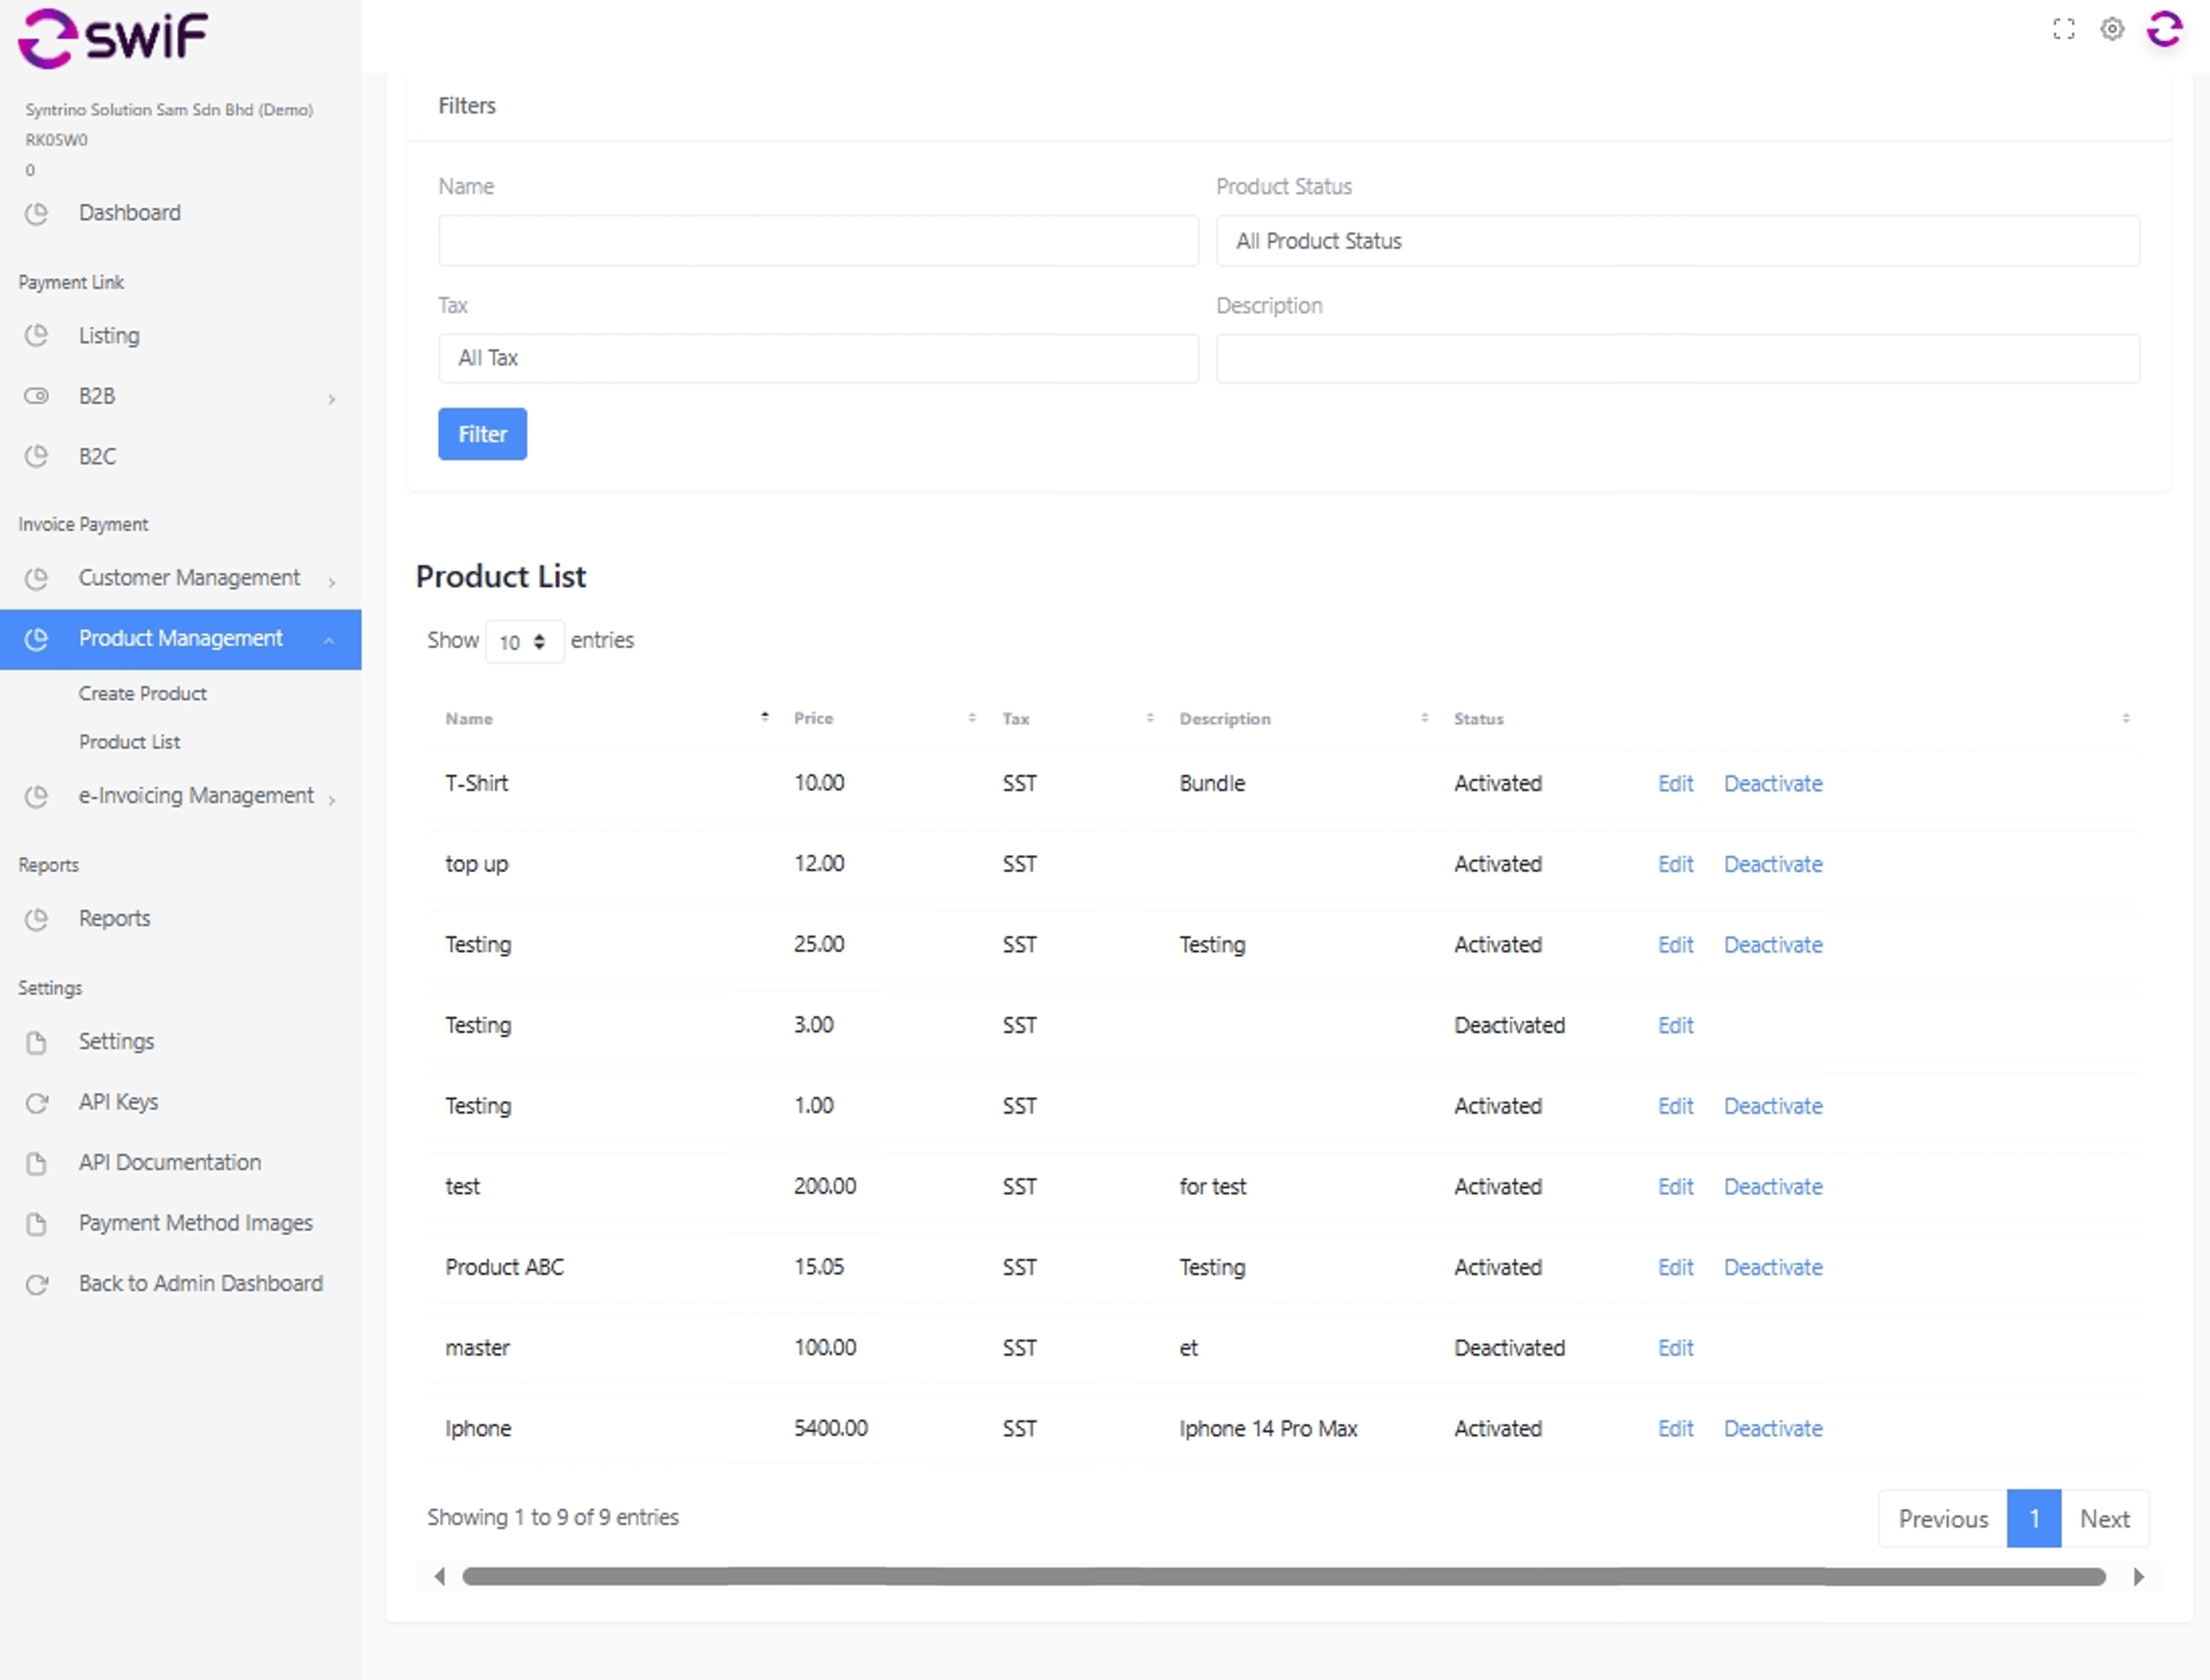
As per when you create a product, you can then edit and deactivate your product anytime by clicking edit.
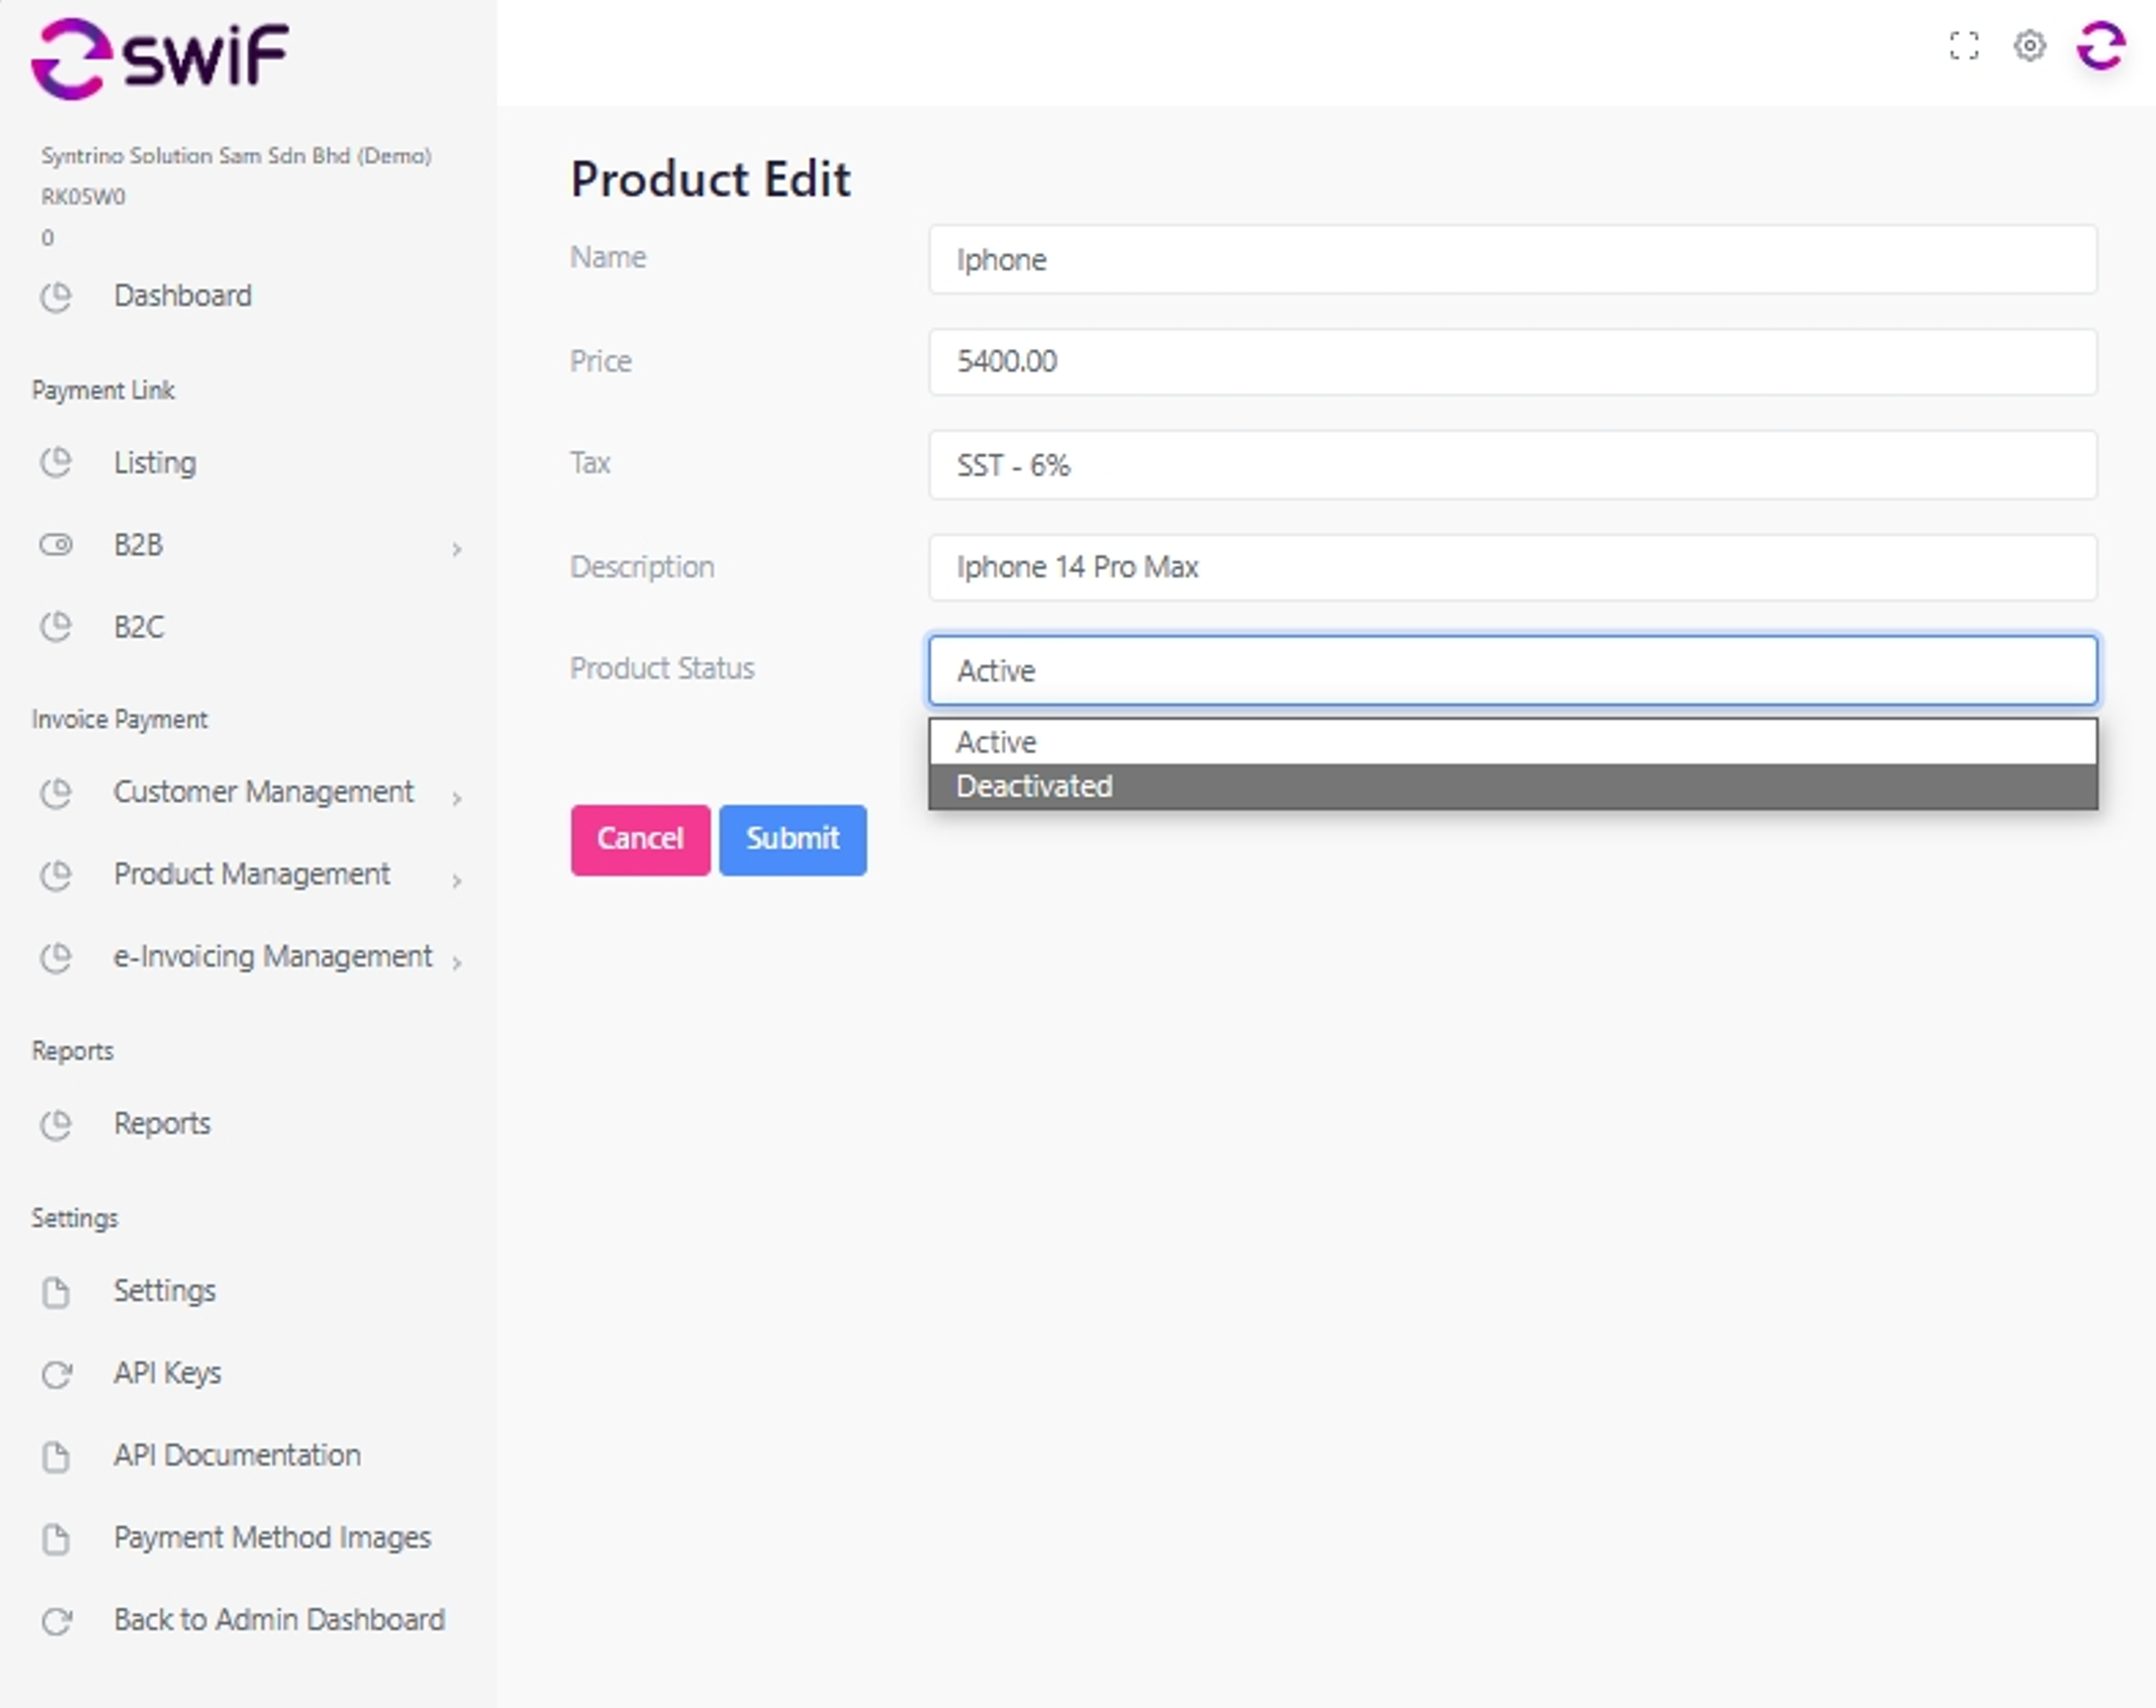
Status will then update in your product list.
Once you have created your product list you can then proceed to create your invoice straight from our SwiF platform.
Go to e-Invoice Management
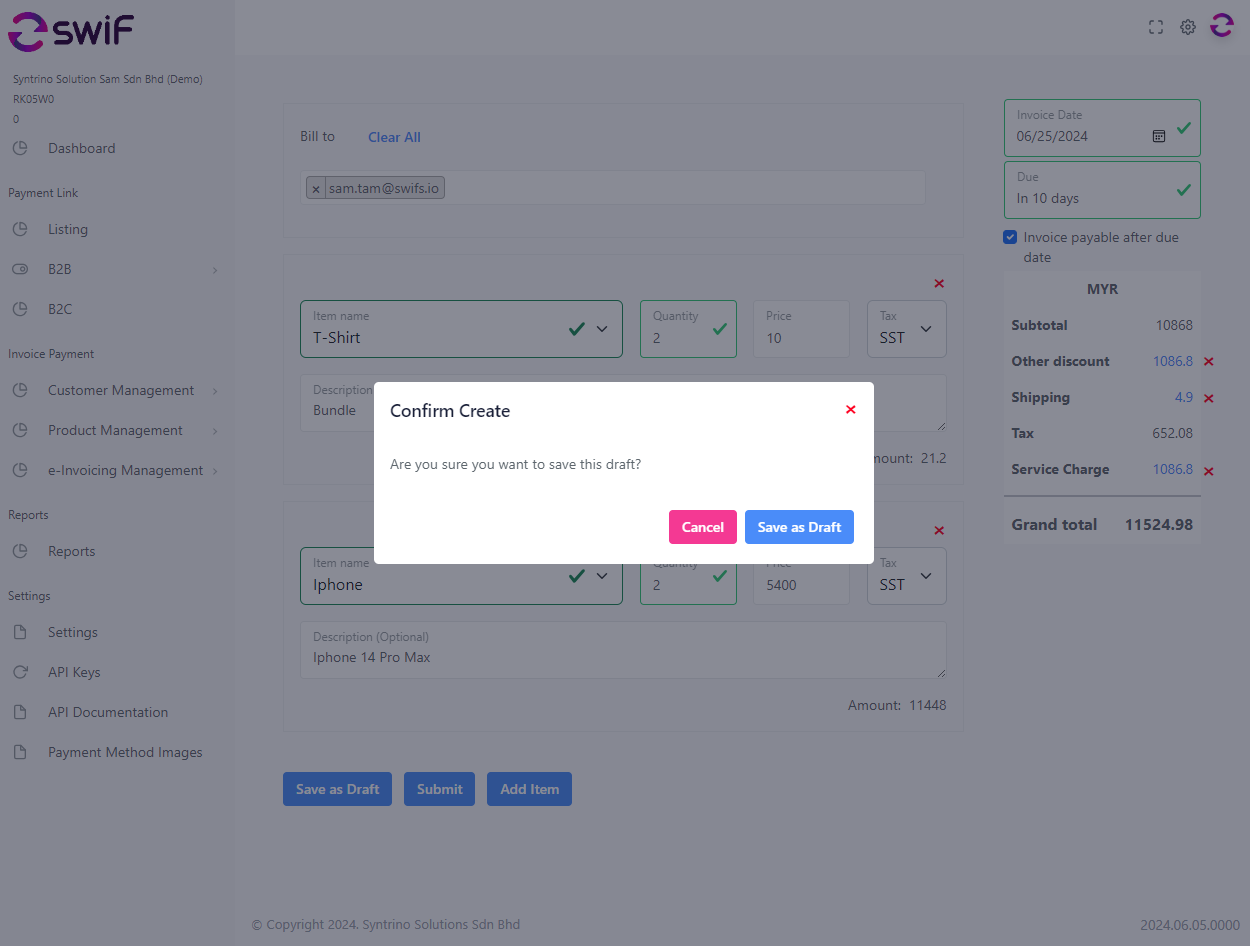
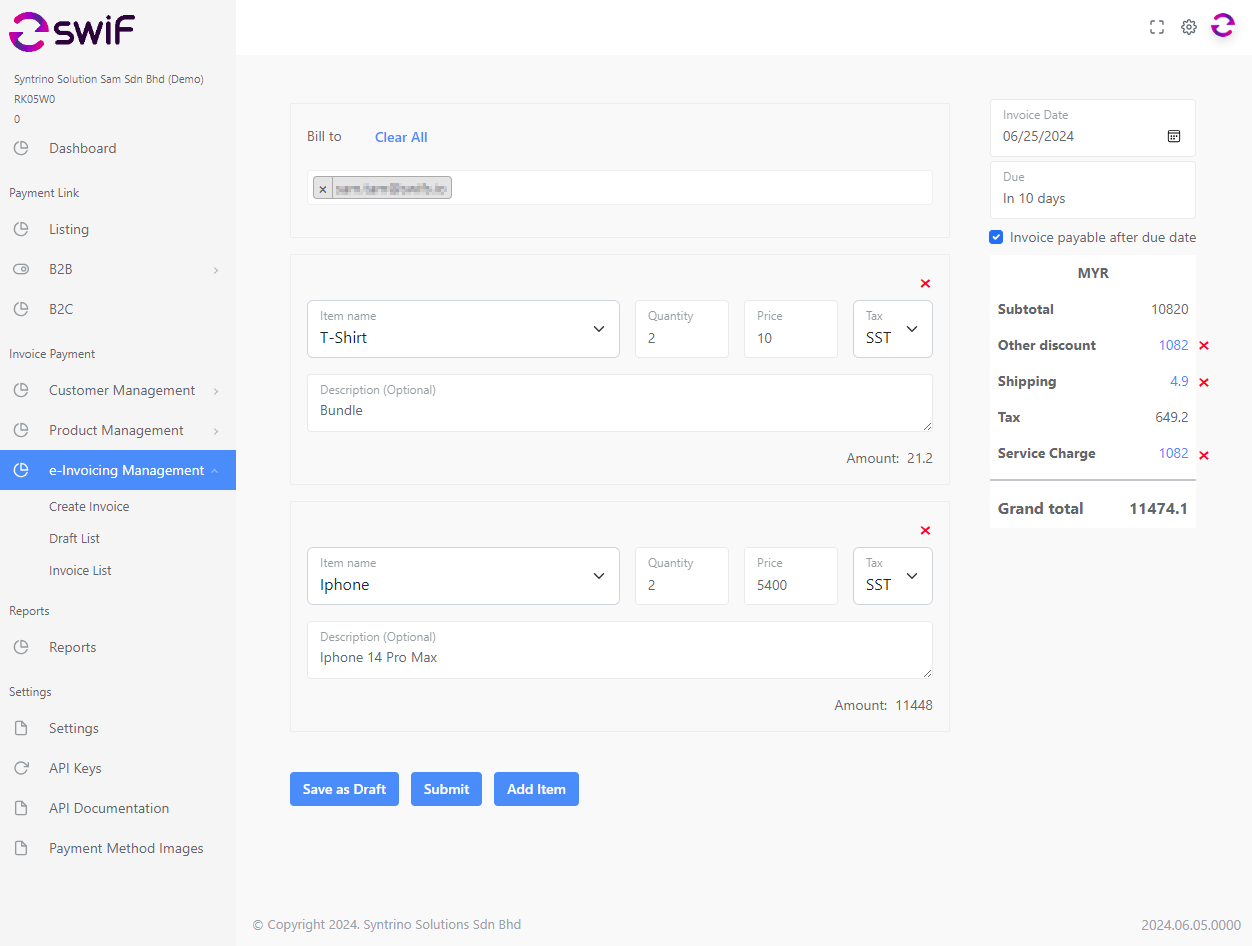
Create invoice and key in all details.
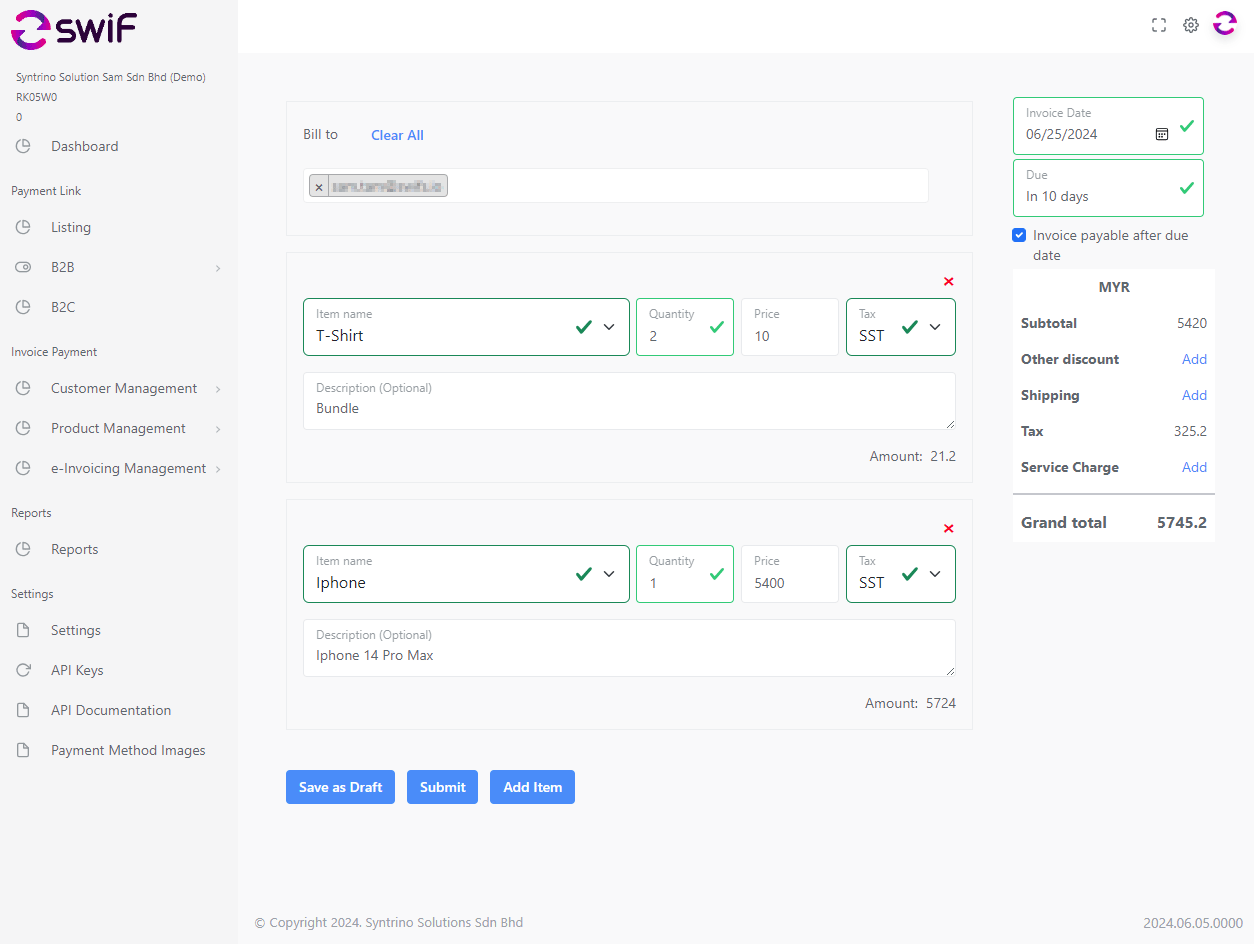
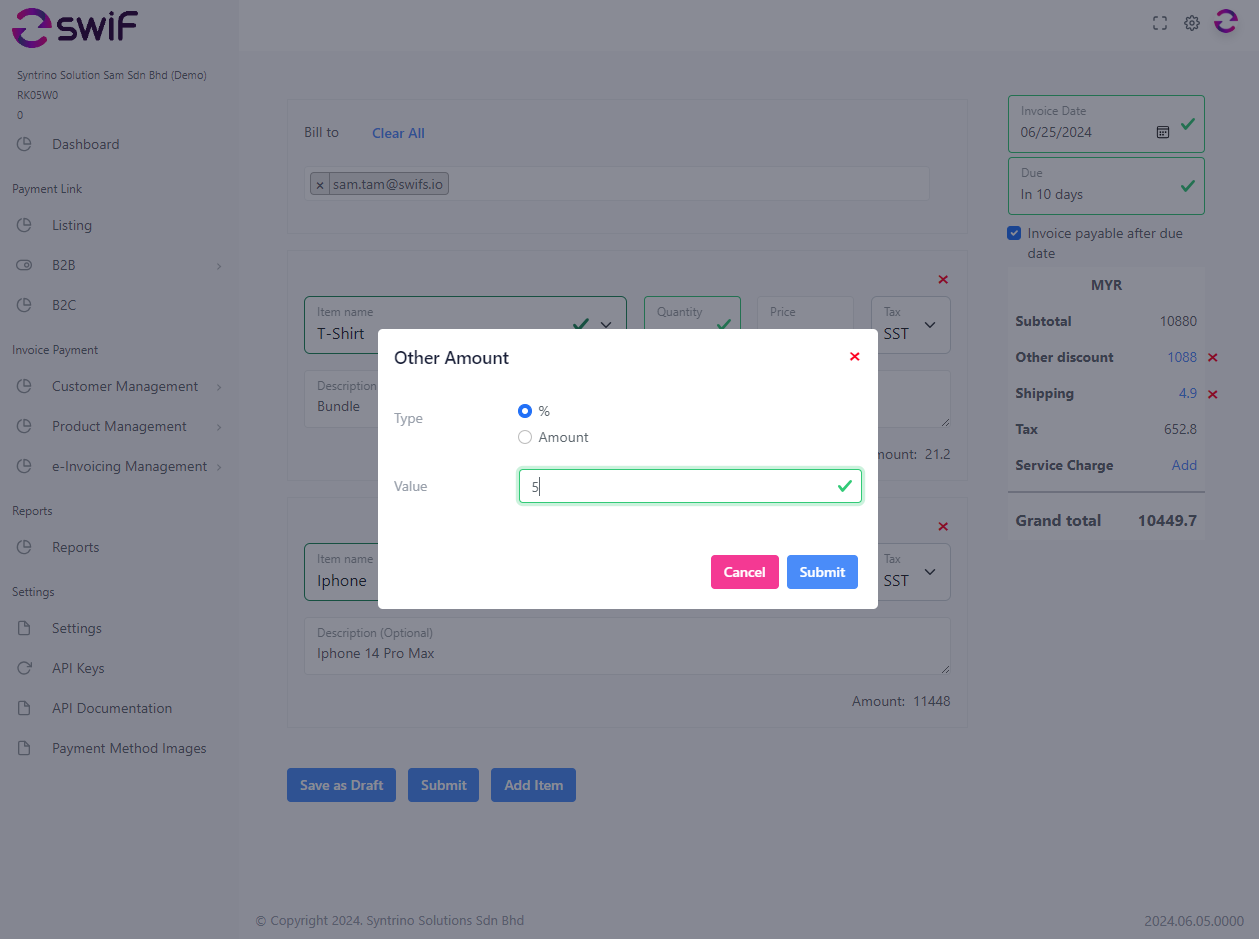
Add as many items and specifics as required.
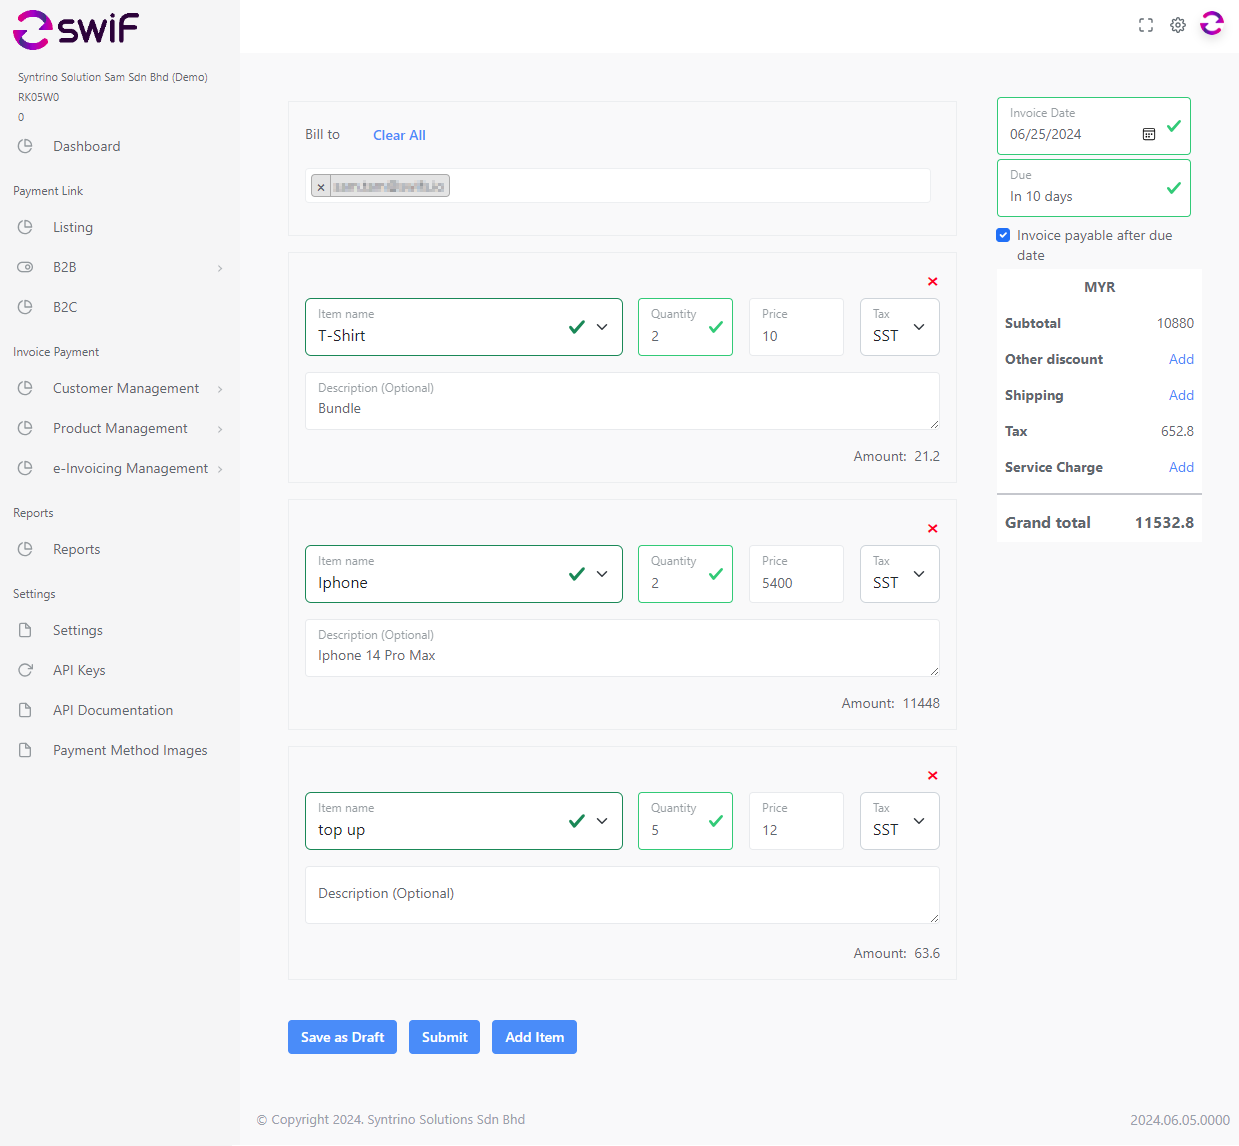
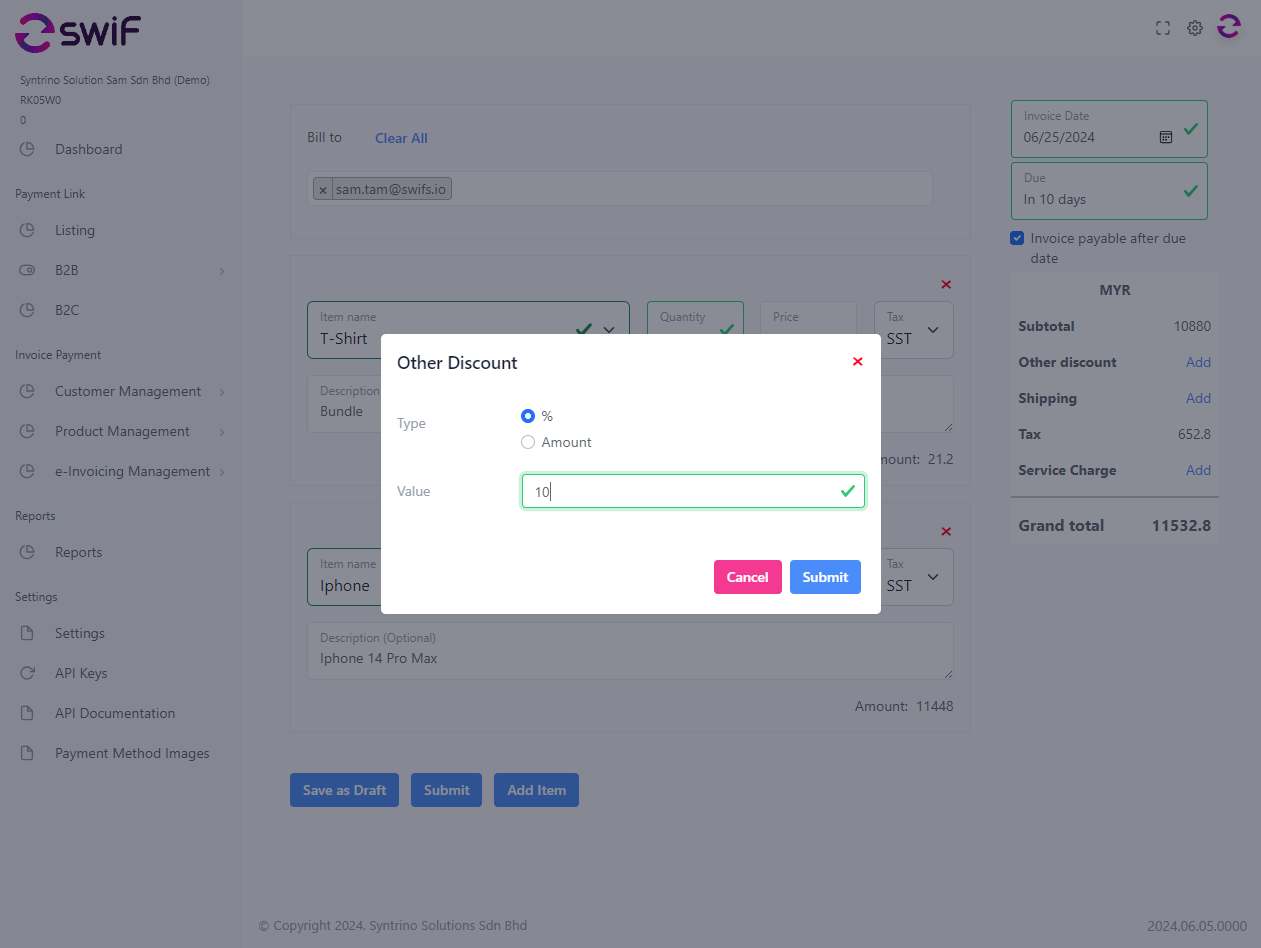
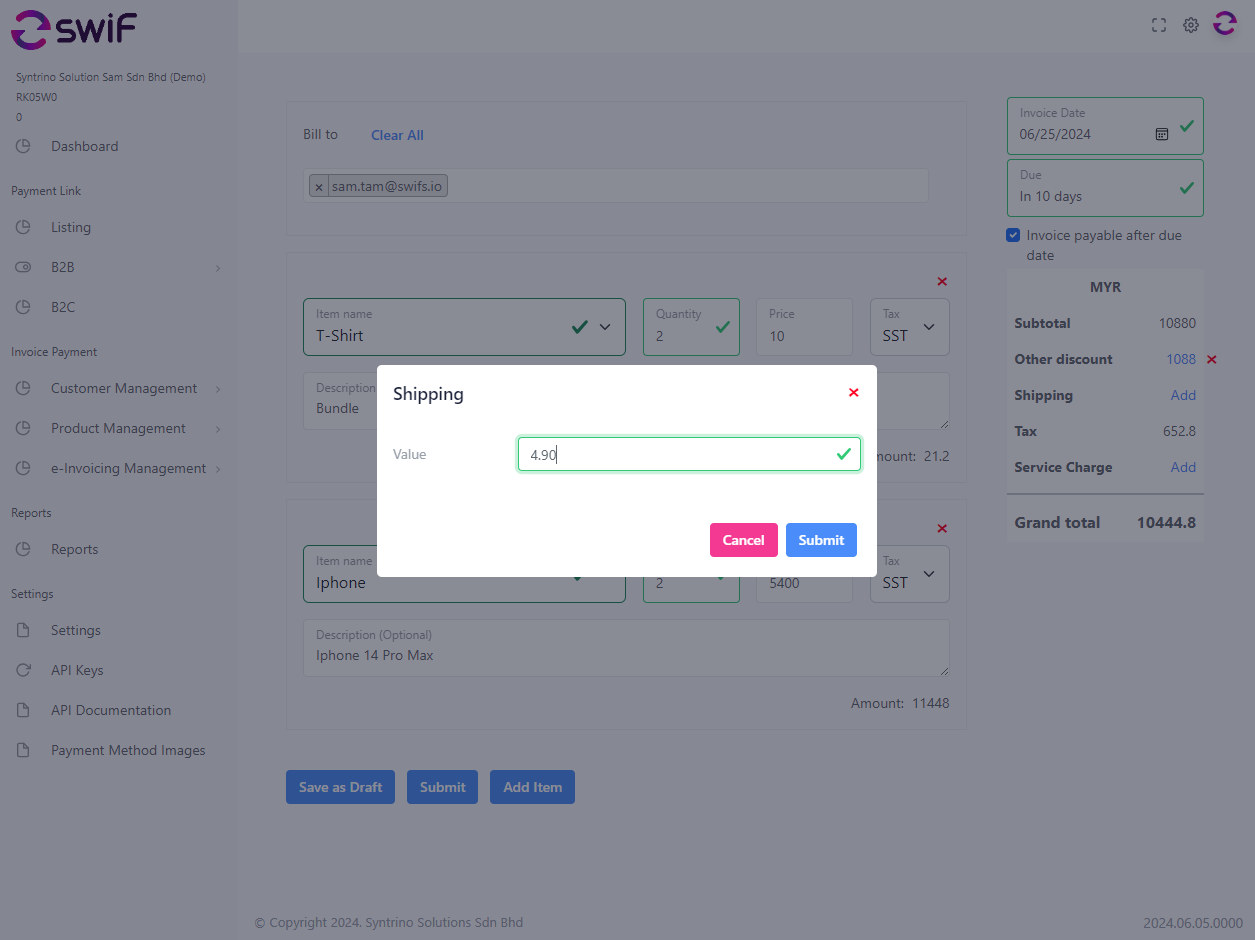
Add discounts, shipping cost and service charges.
Save as ‘Draft’ or ‘Submit’.
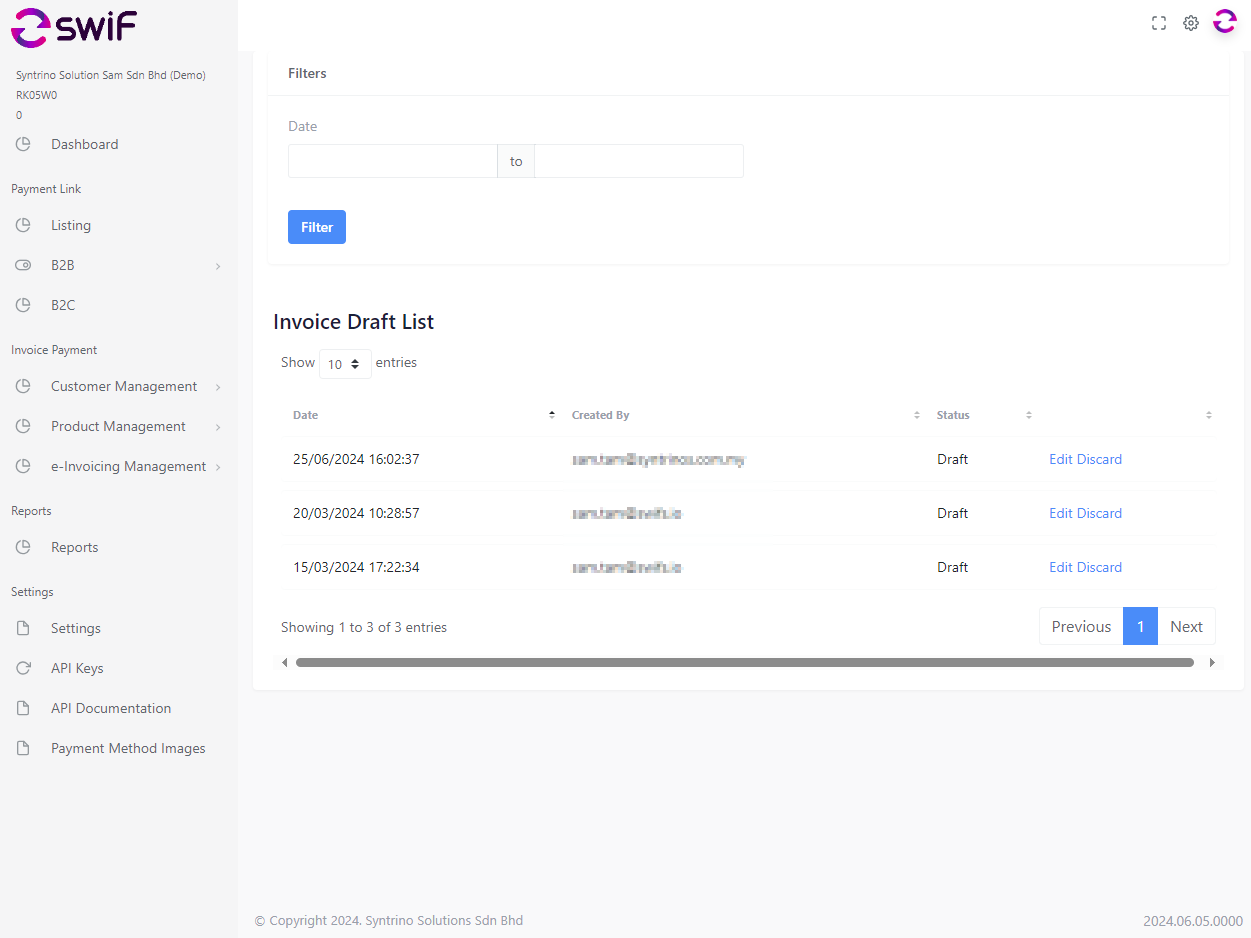
Go to ‘Invoice Draft List’ under ‘e-Invoice Management’, review and press ‘Submit’.
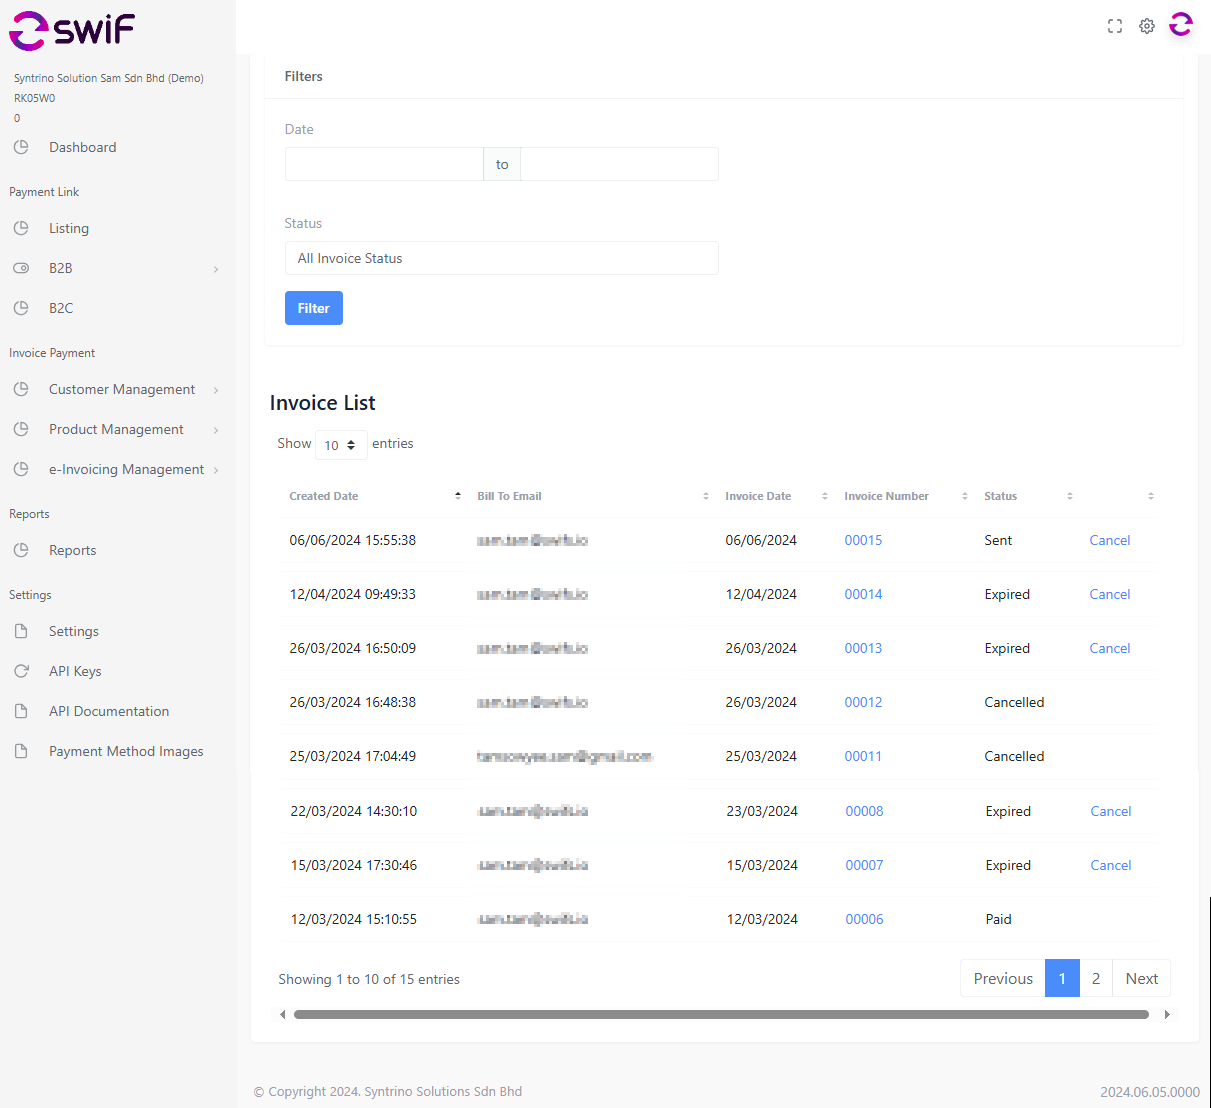
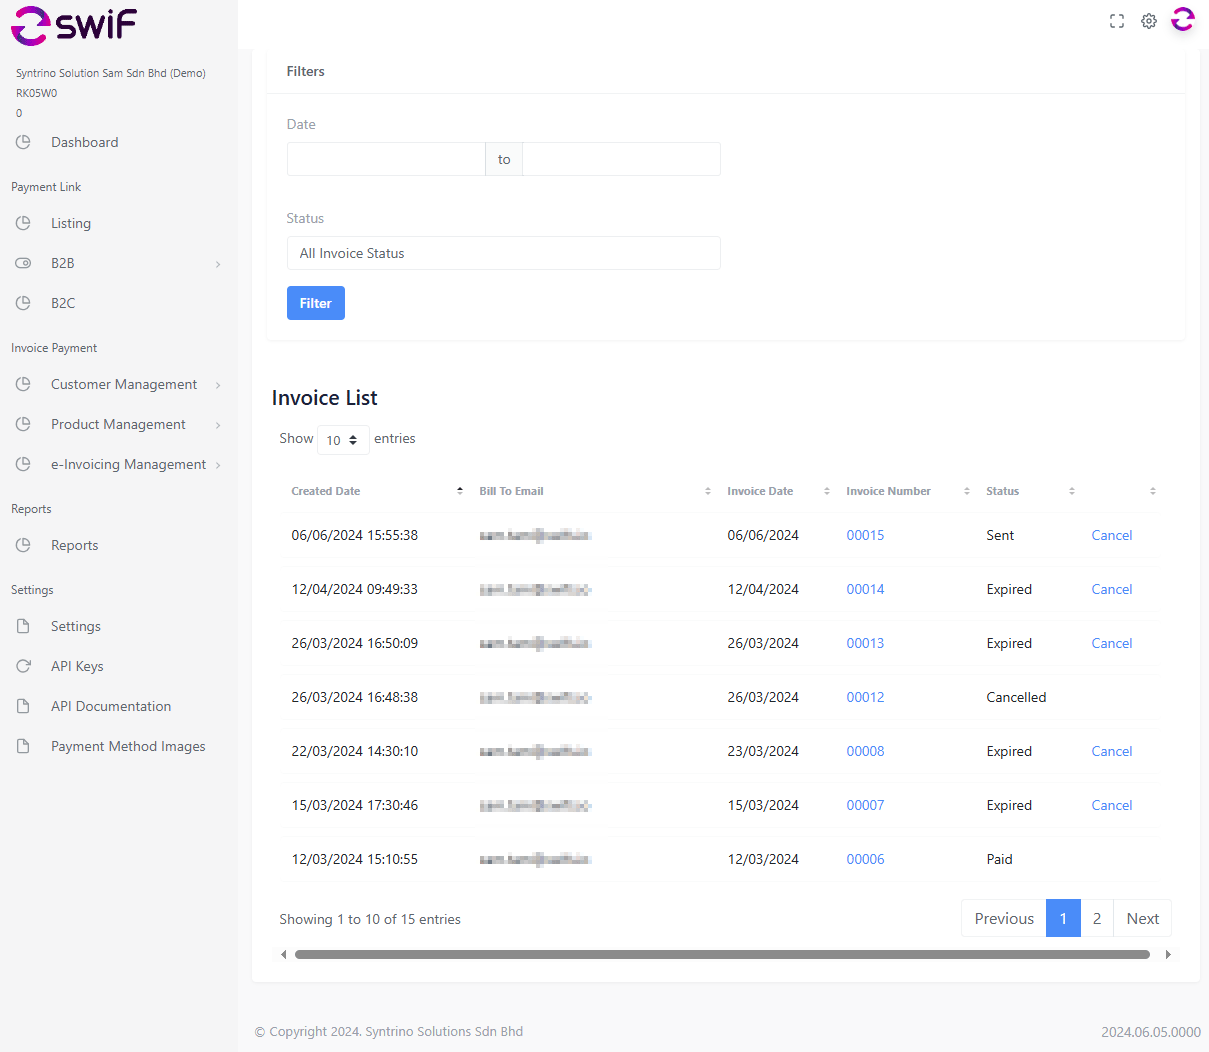
You can find all invoices submitted under ‘e-Invoice Management’, ‘Invoice List’.
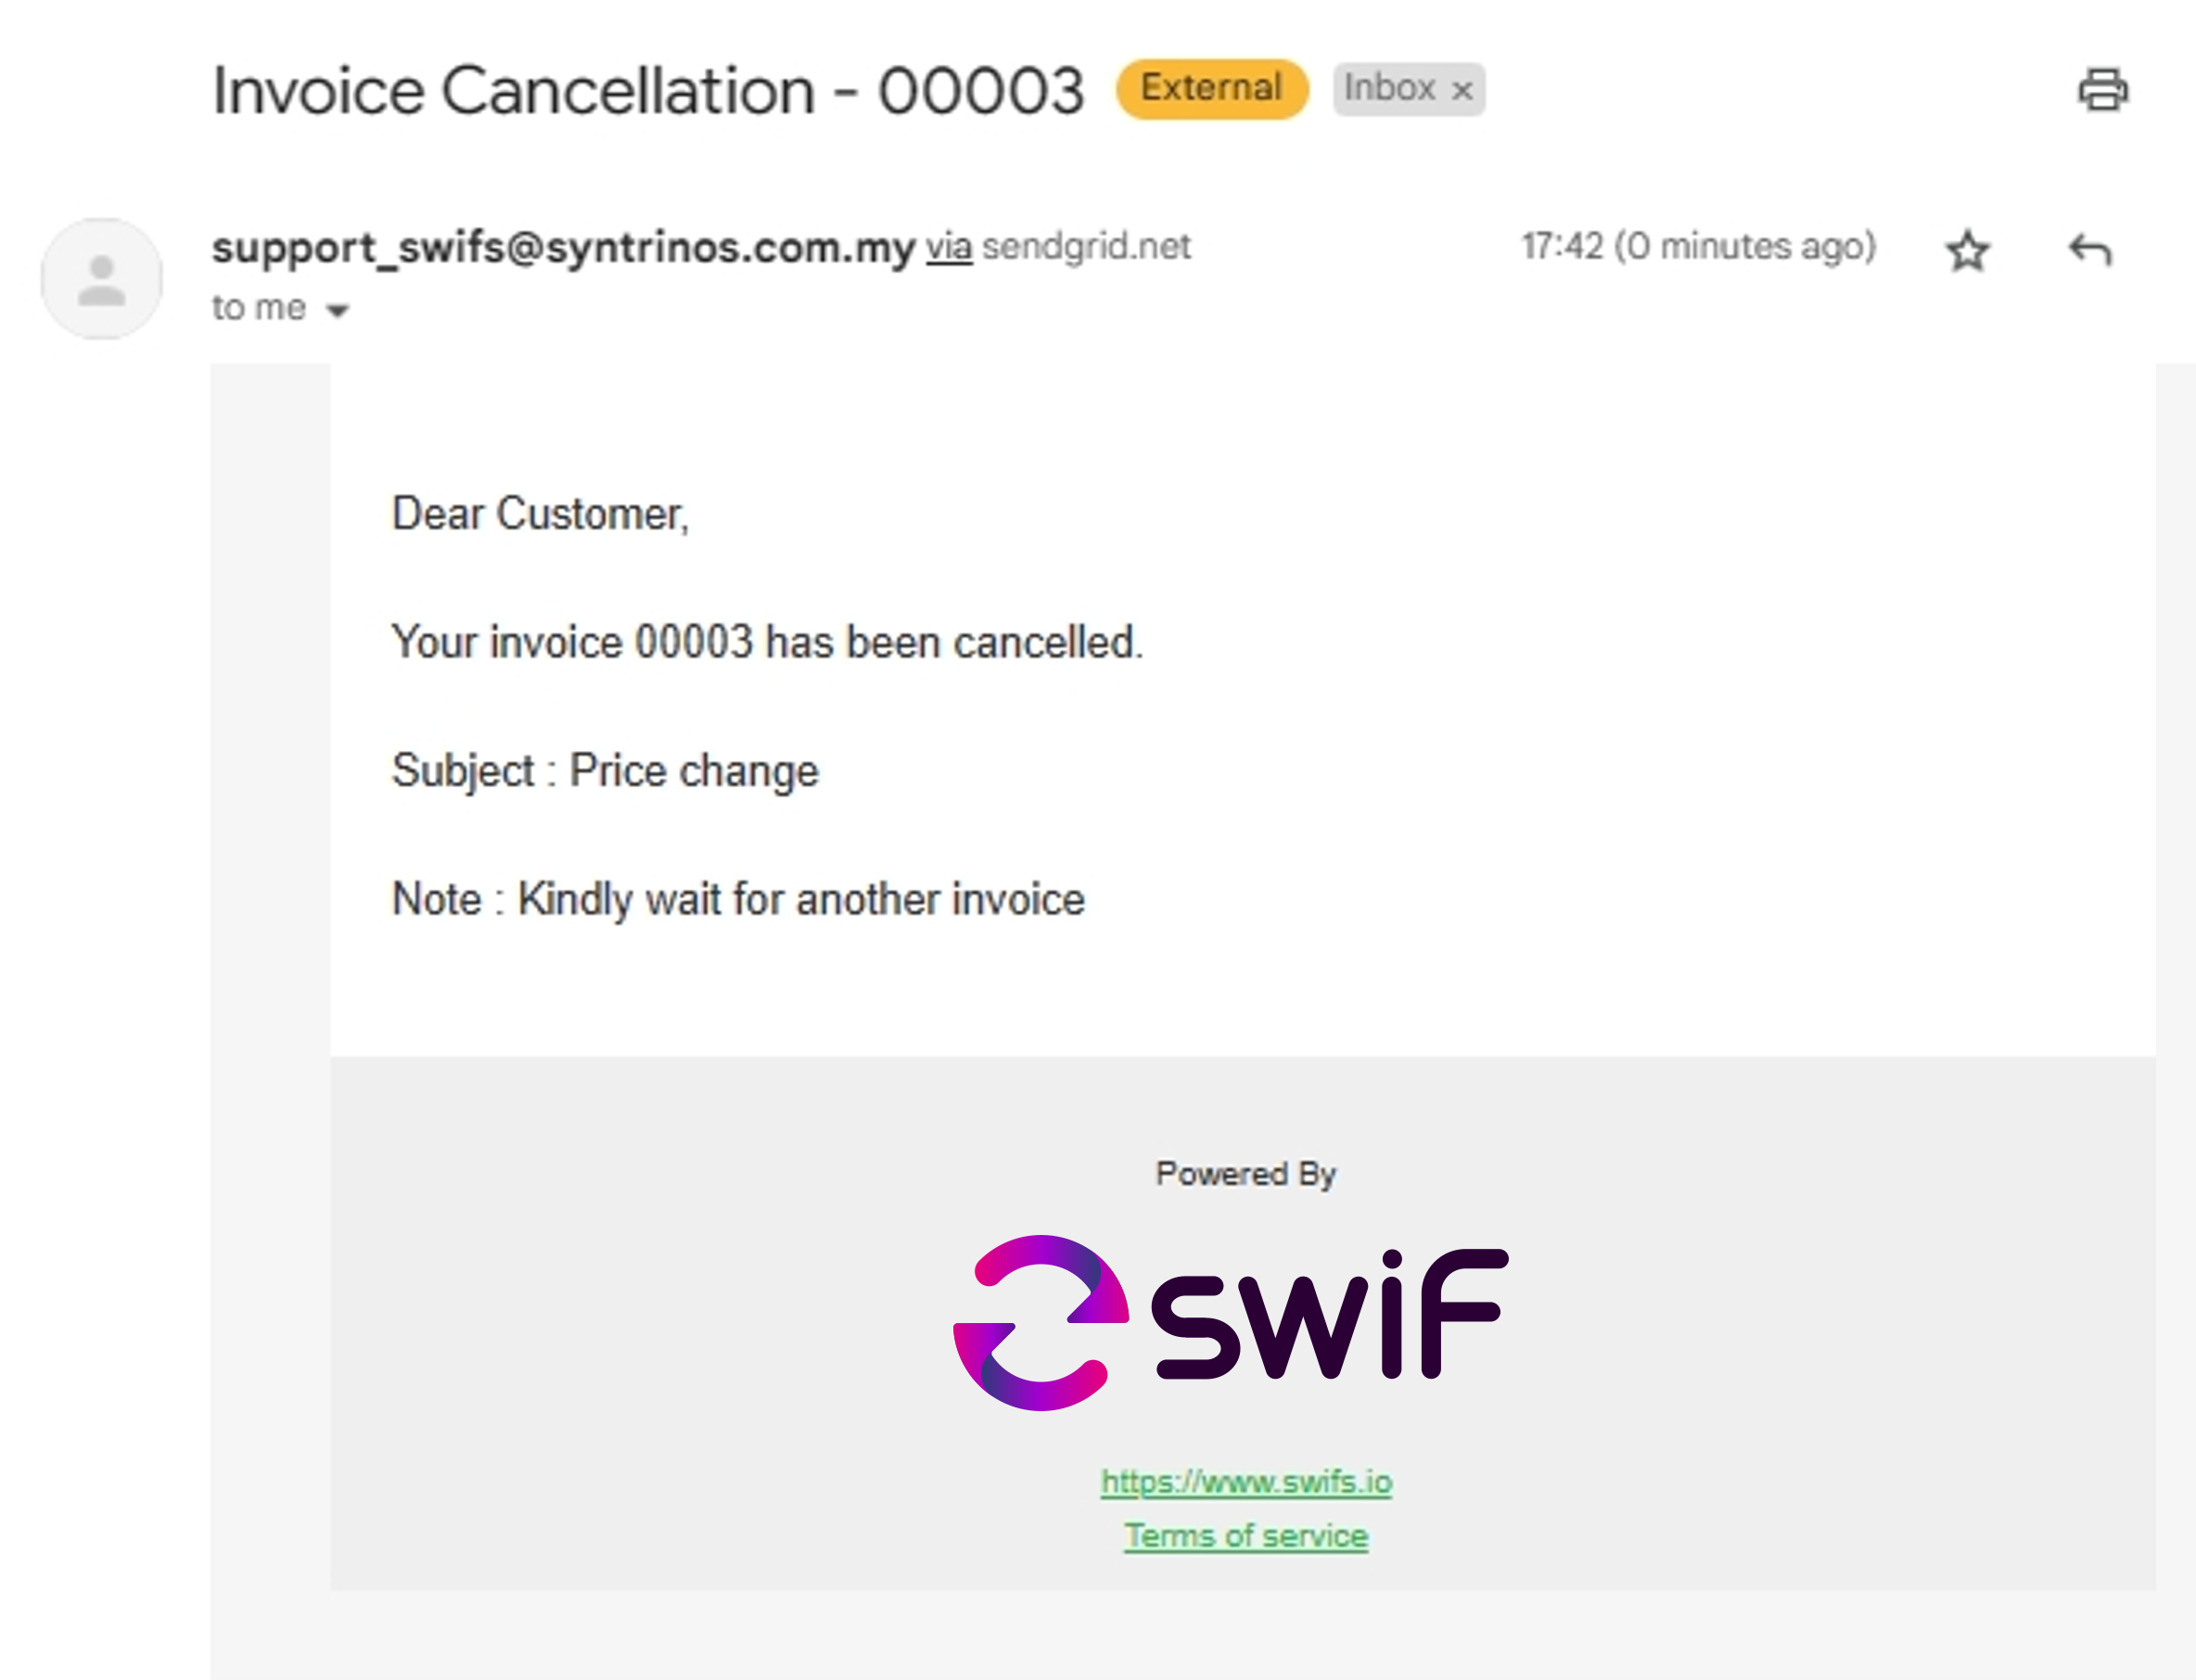
From here, you are still able to cancel your invoice if it is no longer relevant.
Once submitted your customer will receive the e-invoice by email.
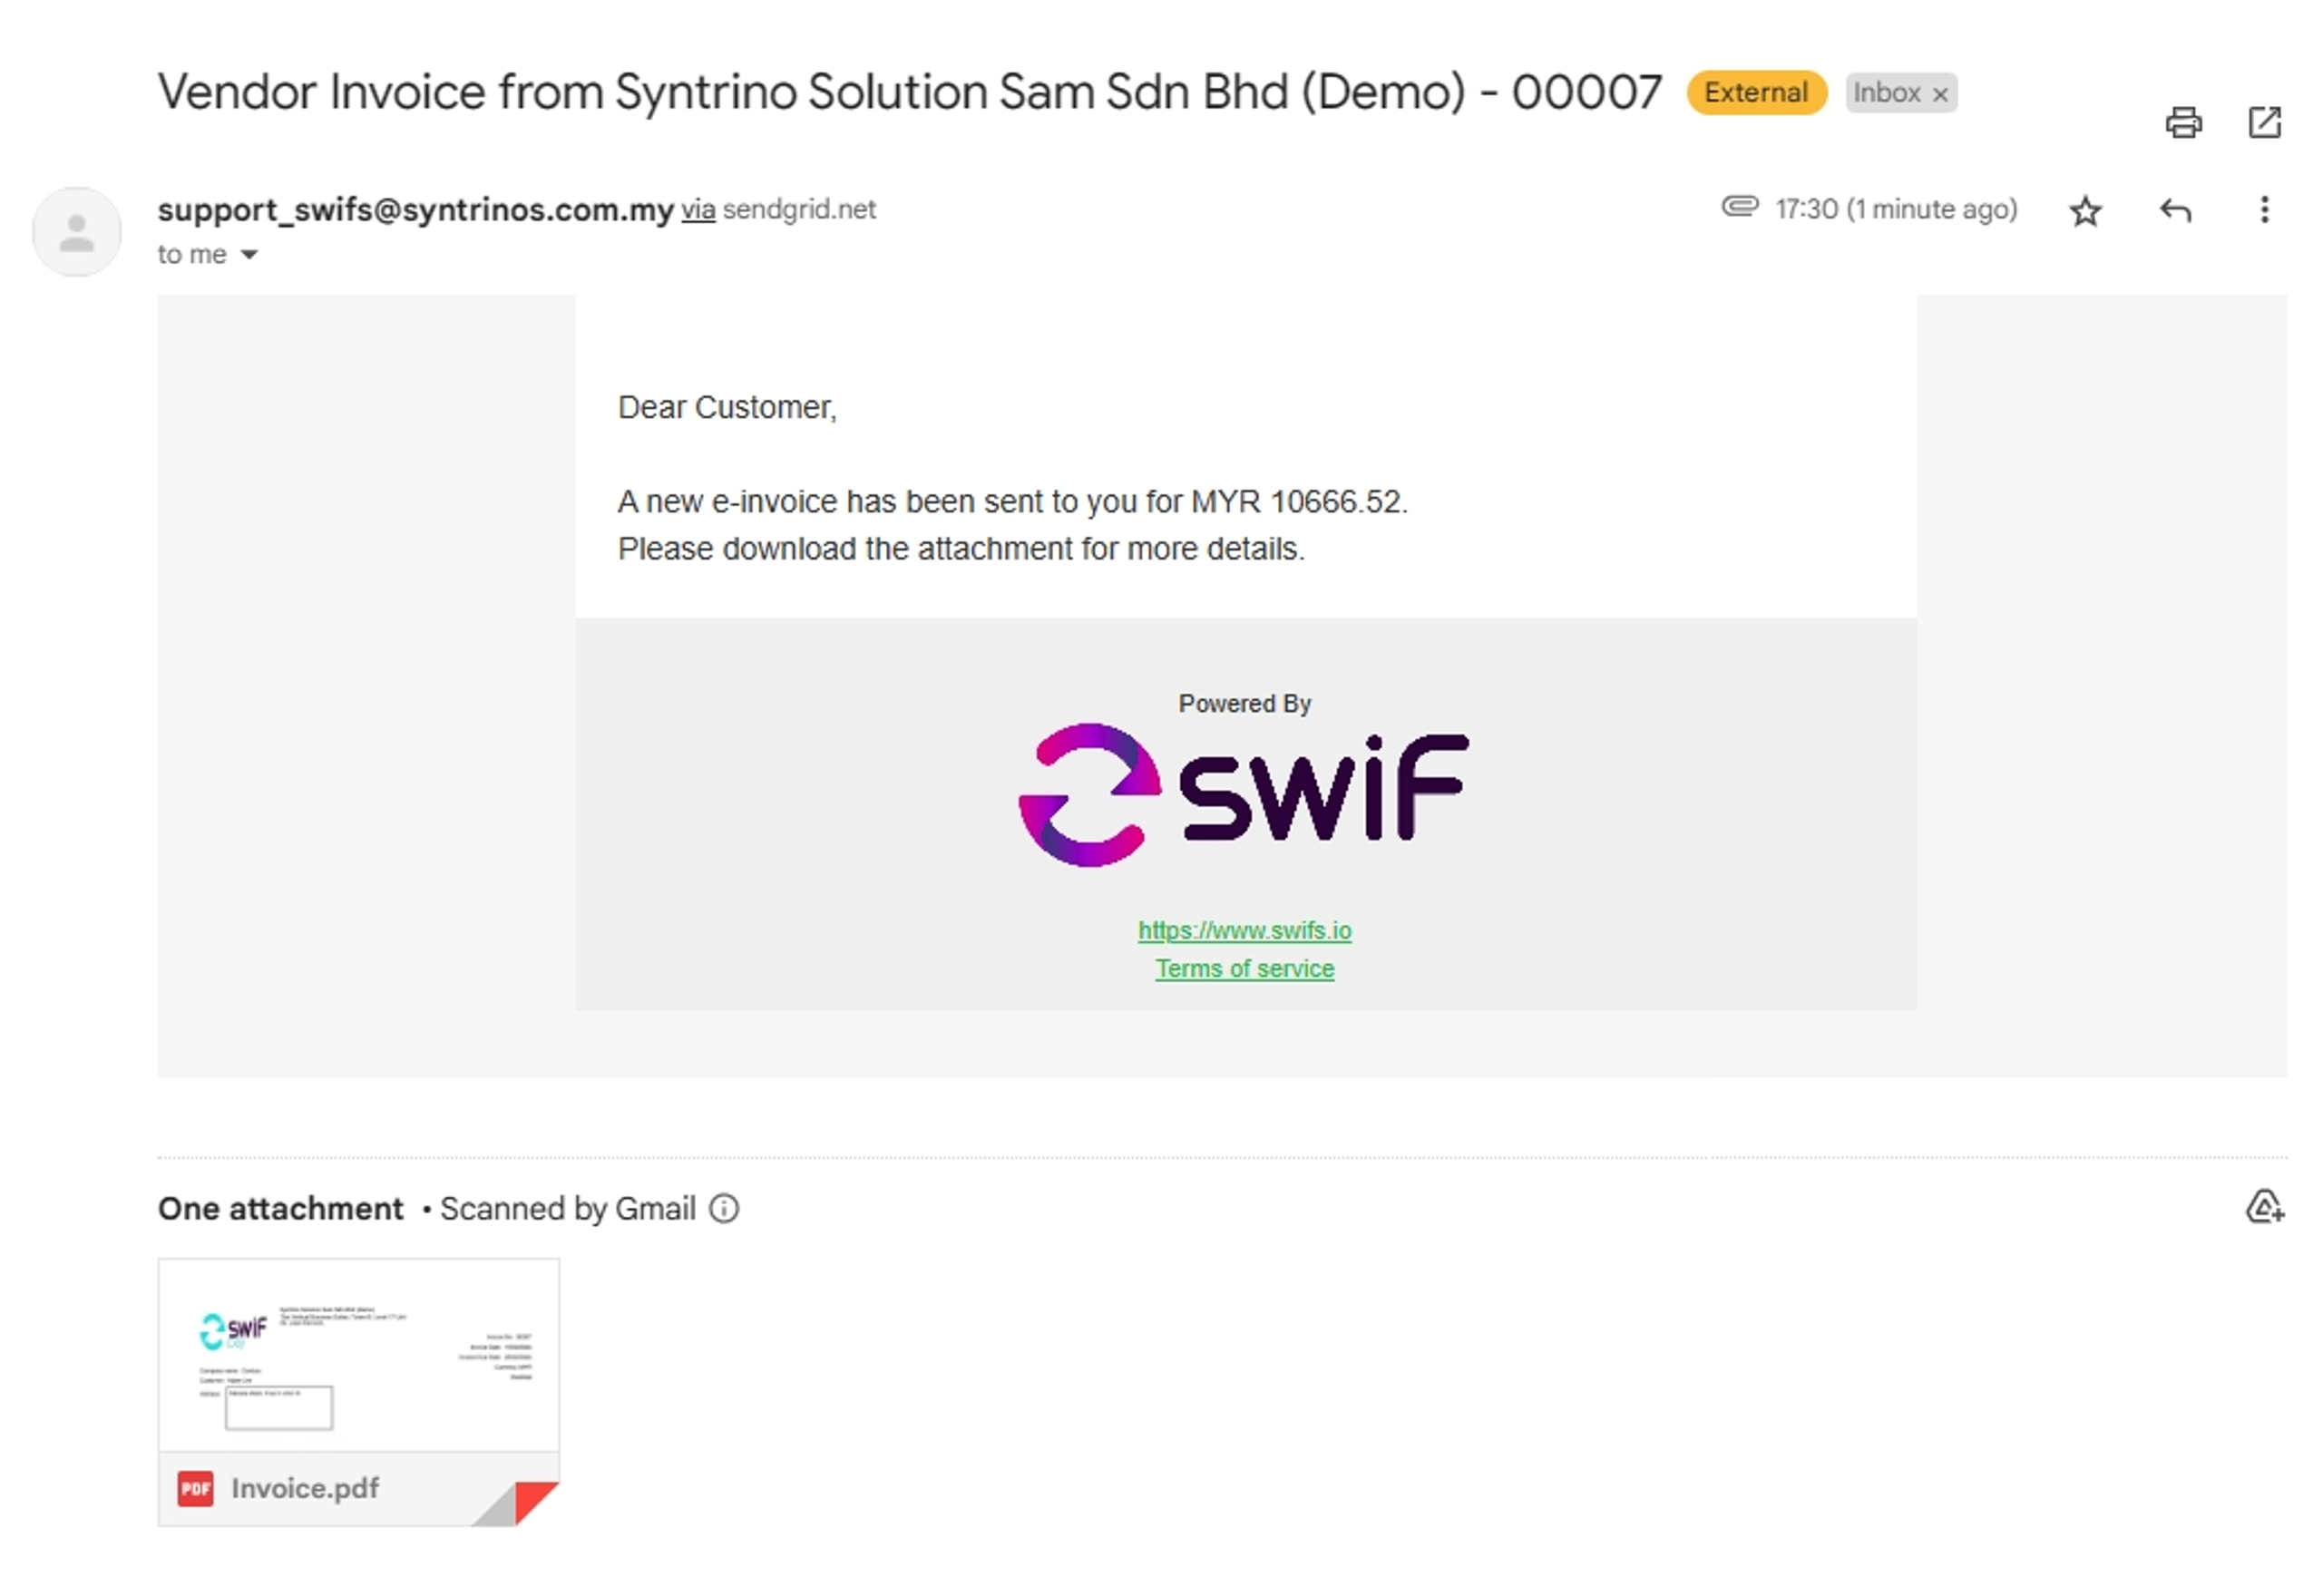
From there your customer can click on the QR code or scan to proceed to payment.
Invoice Cancellation
In the event you need to cancel your invoice after it has gone out.
You can do so by going to your Invoice List Dashboard.
Click cancel with the specific.
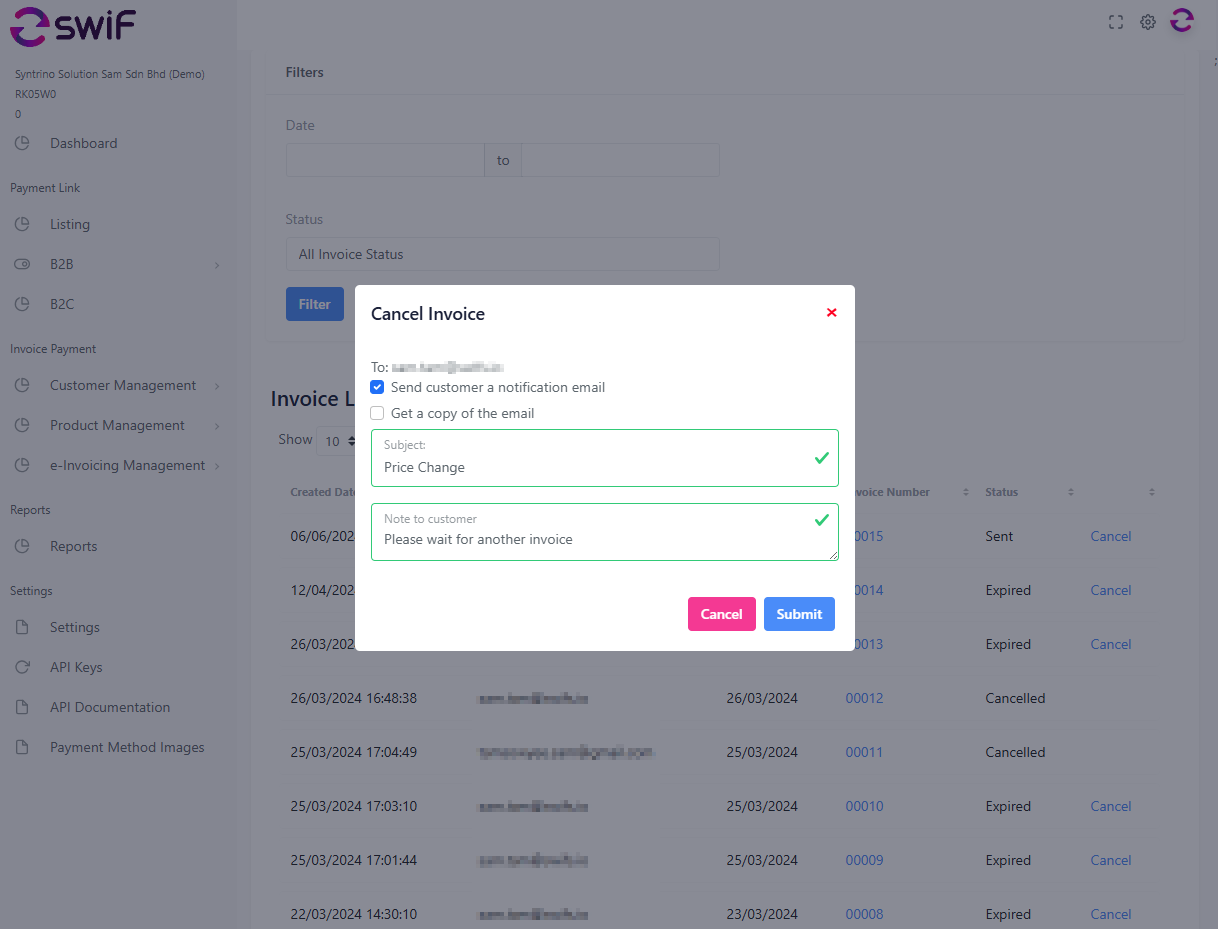
You customer will be notified of the cancellation.