Designed specifically for merchants who operate without a website or e-commerce platform, SwiF B2B Payment Link allows Merchants to collect payments from their customers and stay on top of their business performance in 10 easy steps.
Step 1 – Merchant creates the invoice
- Go to your Dashboard and click ‘Payment Link B2B’.
- Upload your company invoice and fill up the transaction details.
- Choose the payment methods you want to offer your customers.
- Enter your customer’s email to automatically send the payment link to them.
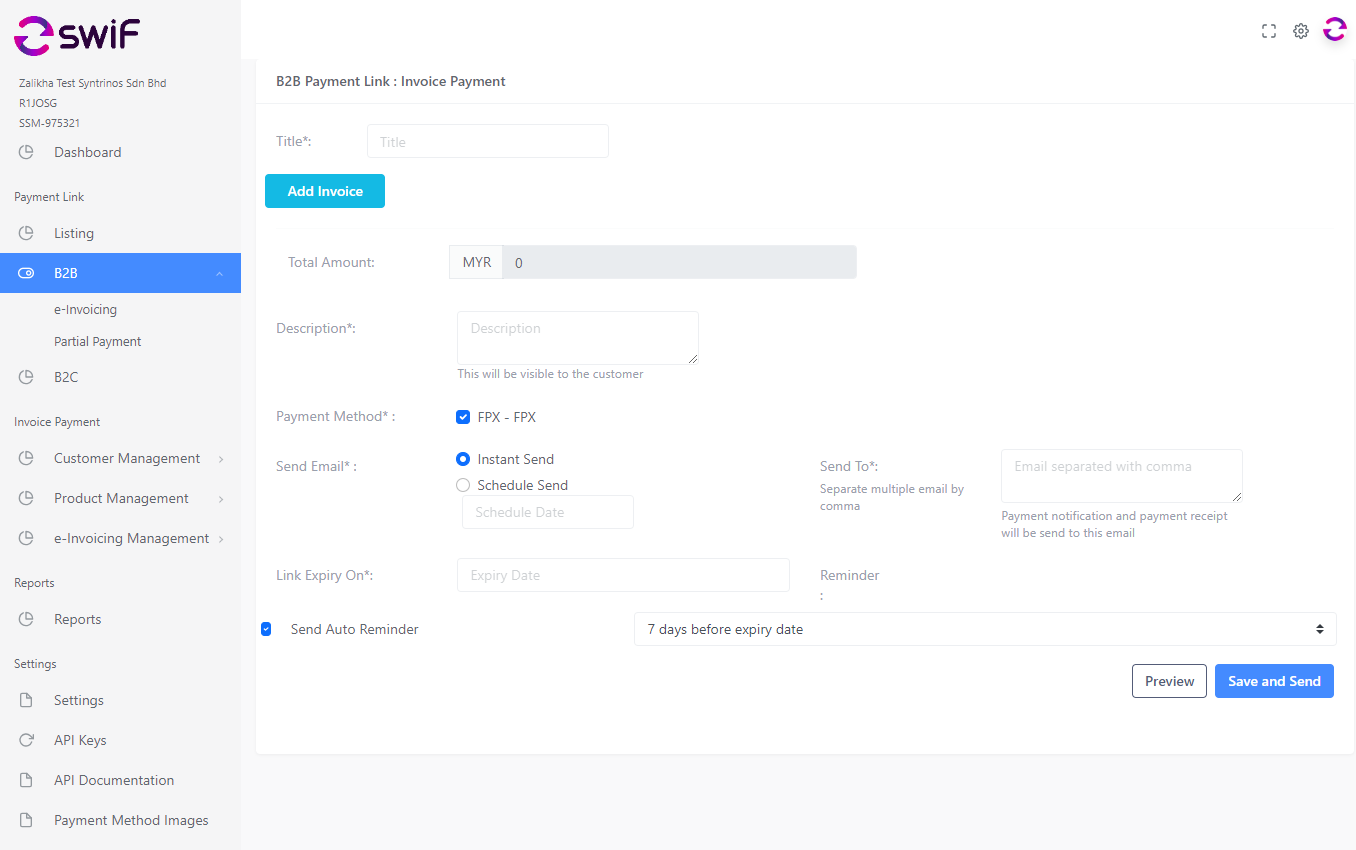
The merchant has the option to send multiple invoices using a single payment link, a feature known as batch payments or mass payments. They can also pre-schedule the payment link, set its expiry/due date, and determine the frequency of reminders.
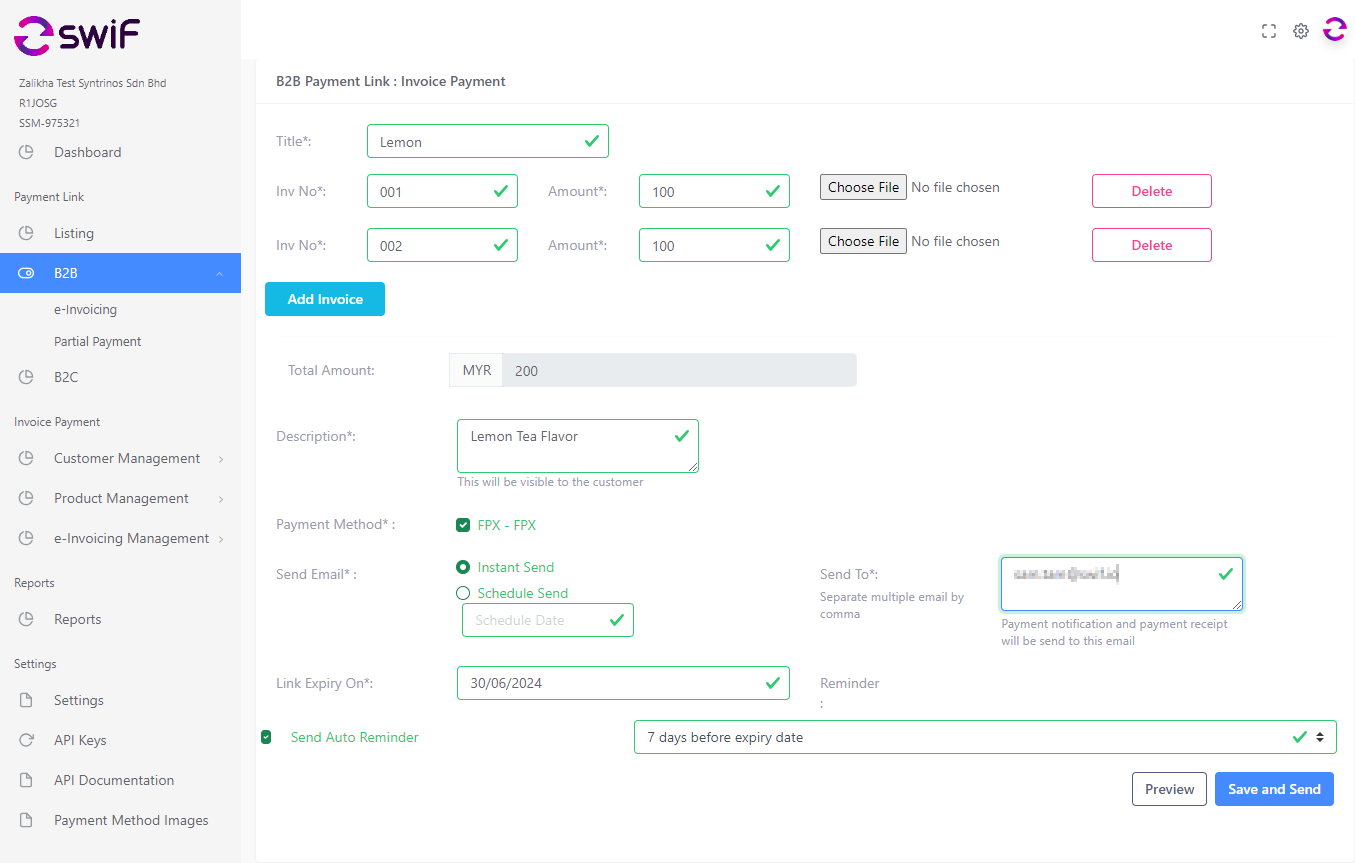
Step 2 – Click ‘Preview’ to ensure all details are correct before you generate the final link. Click ‘Save’ and ‘Send’.
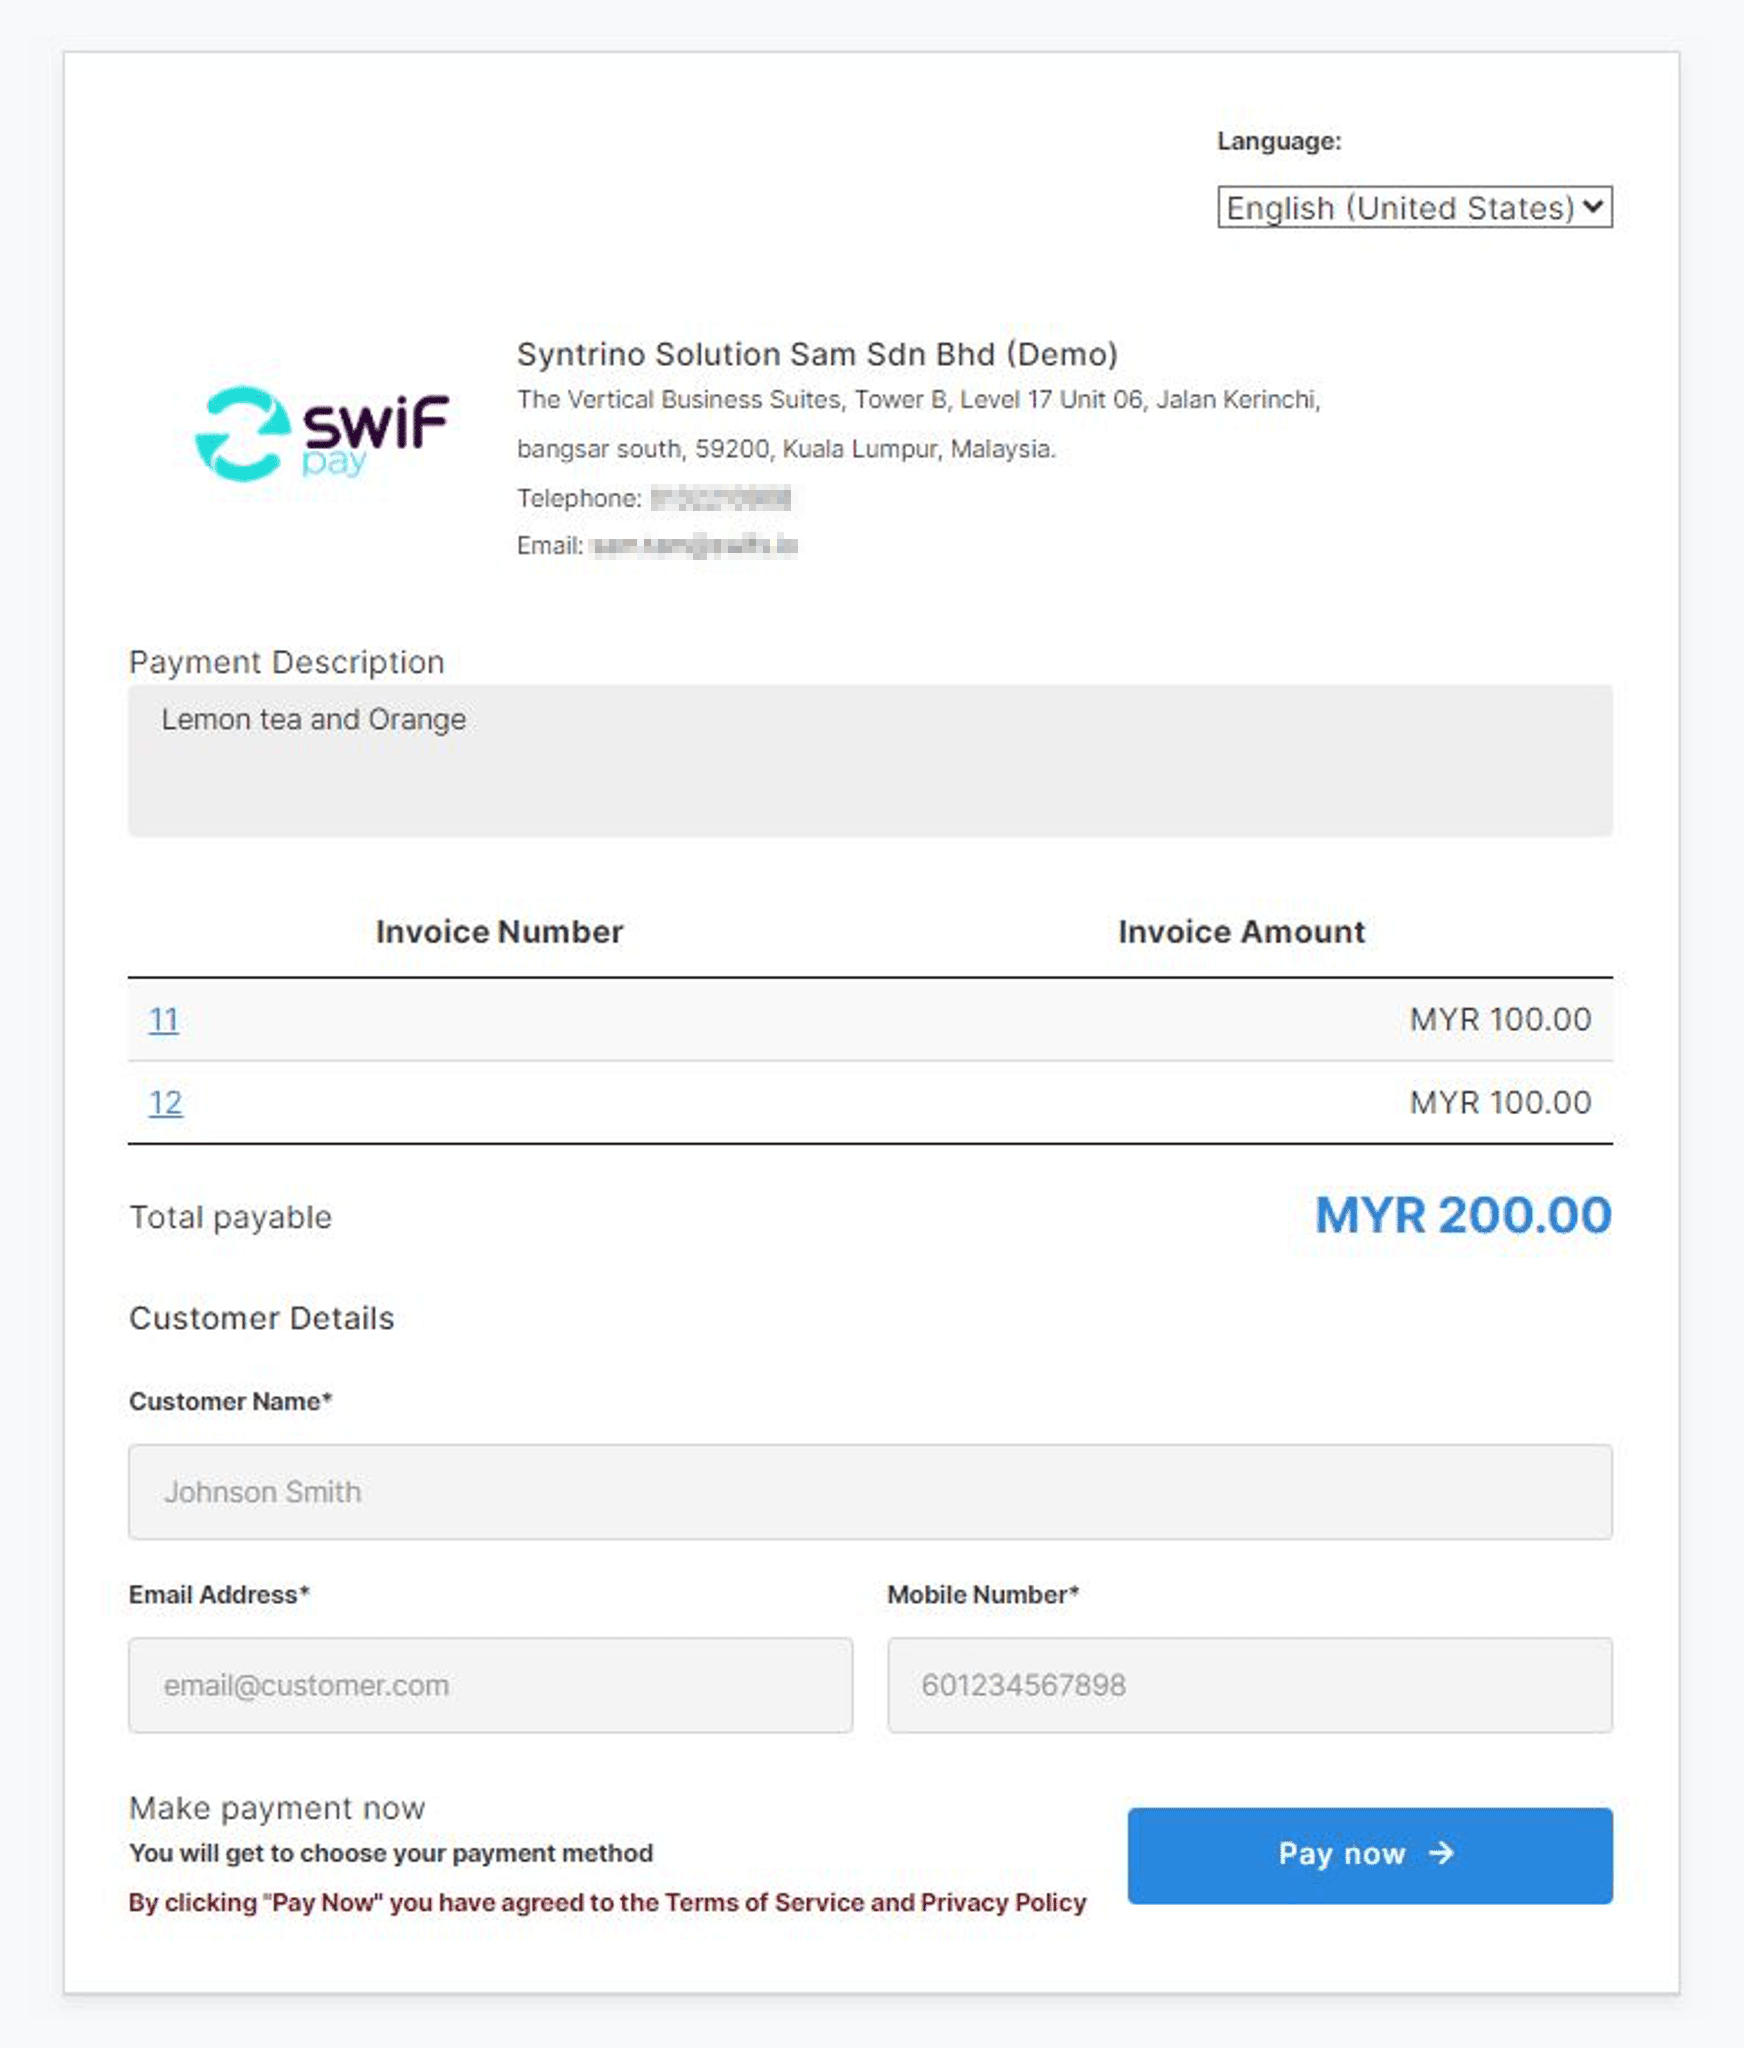
Step 3 – Customer receives an email with a payment request and a link to proceed with the payment.

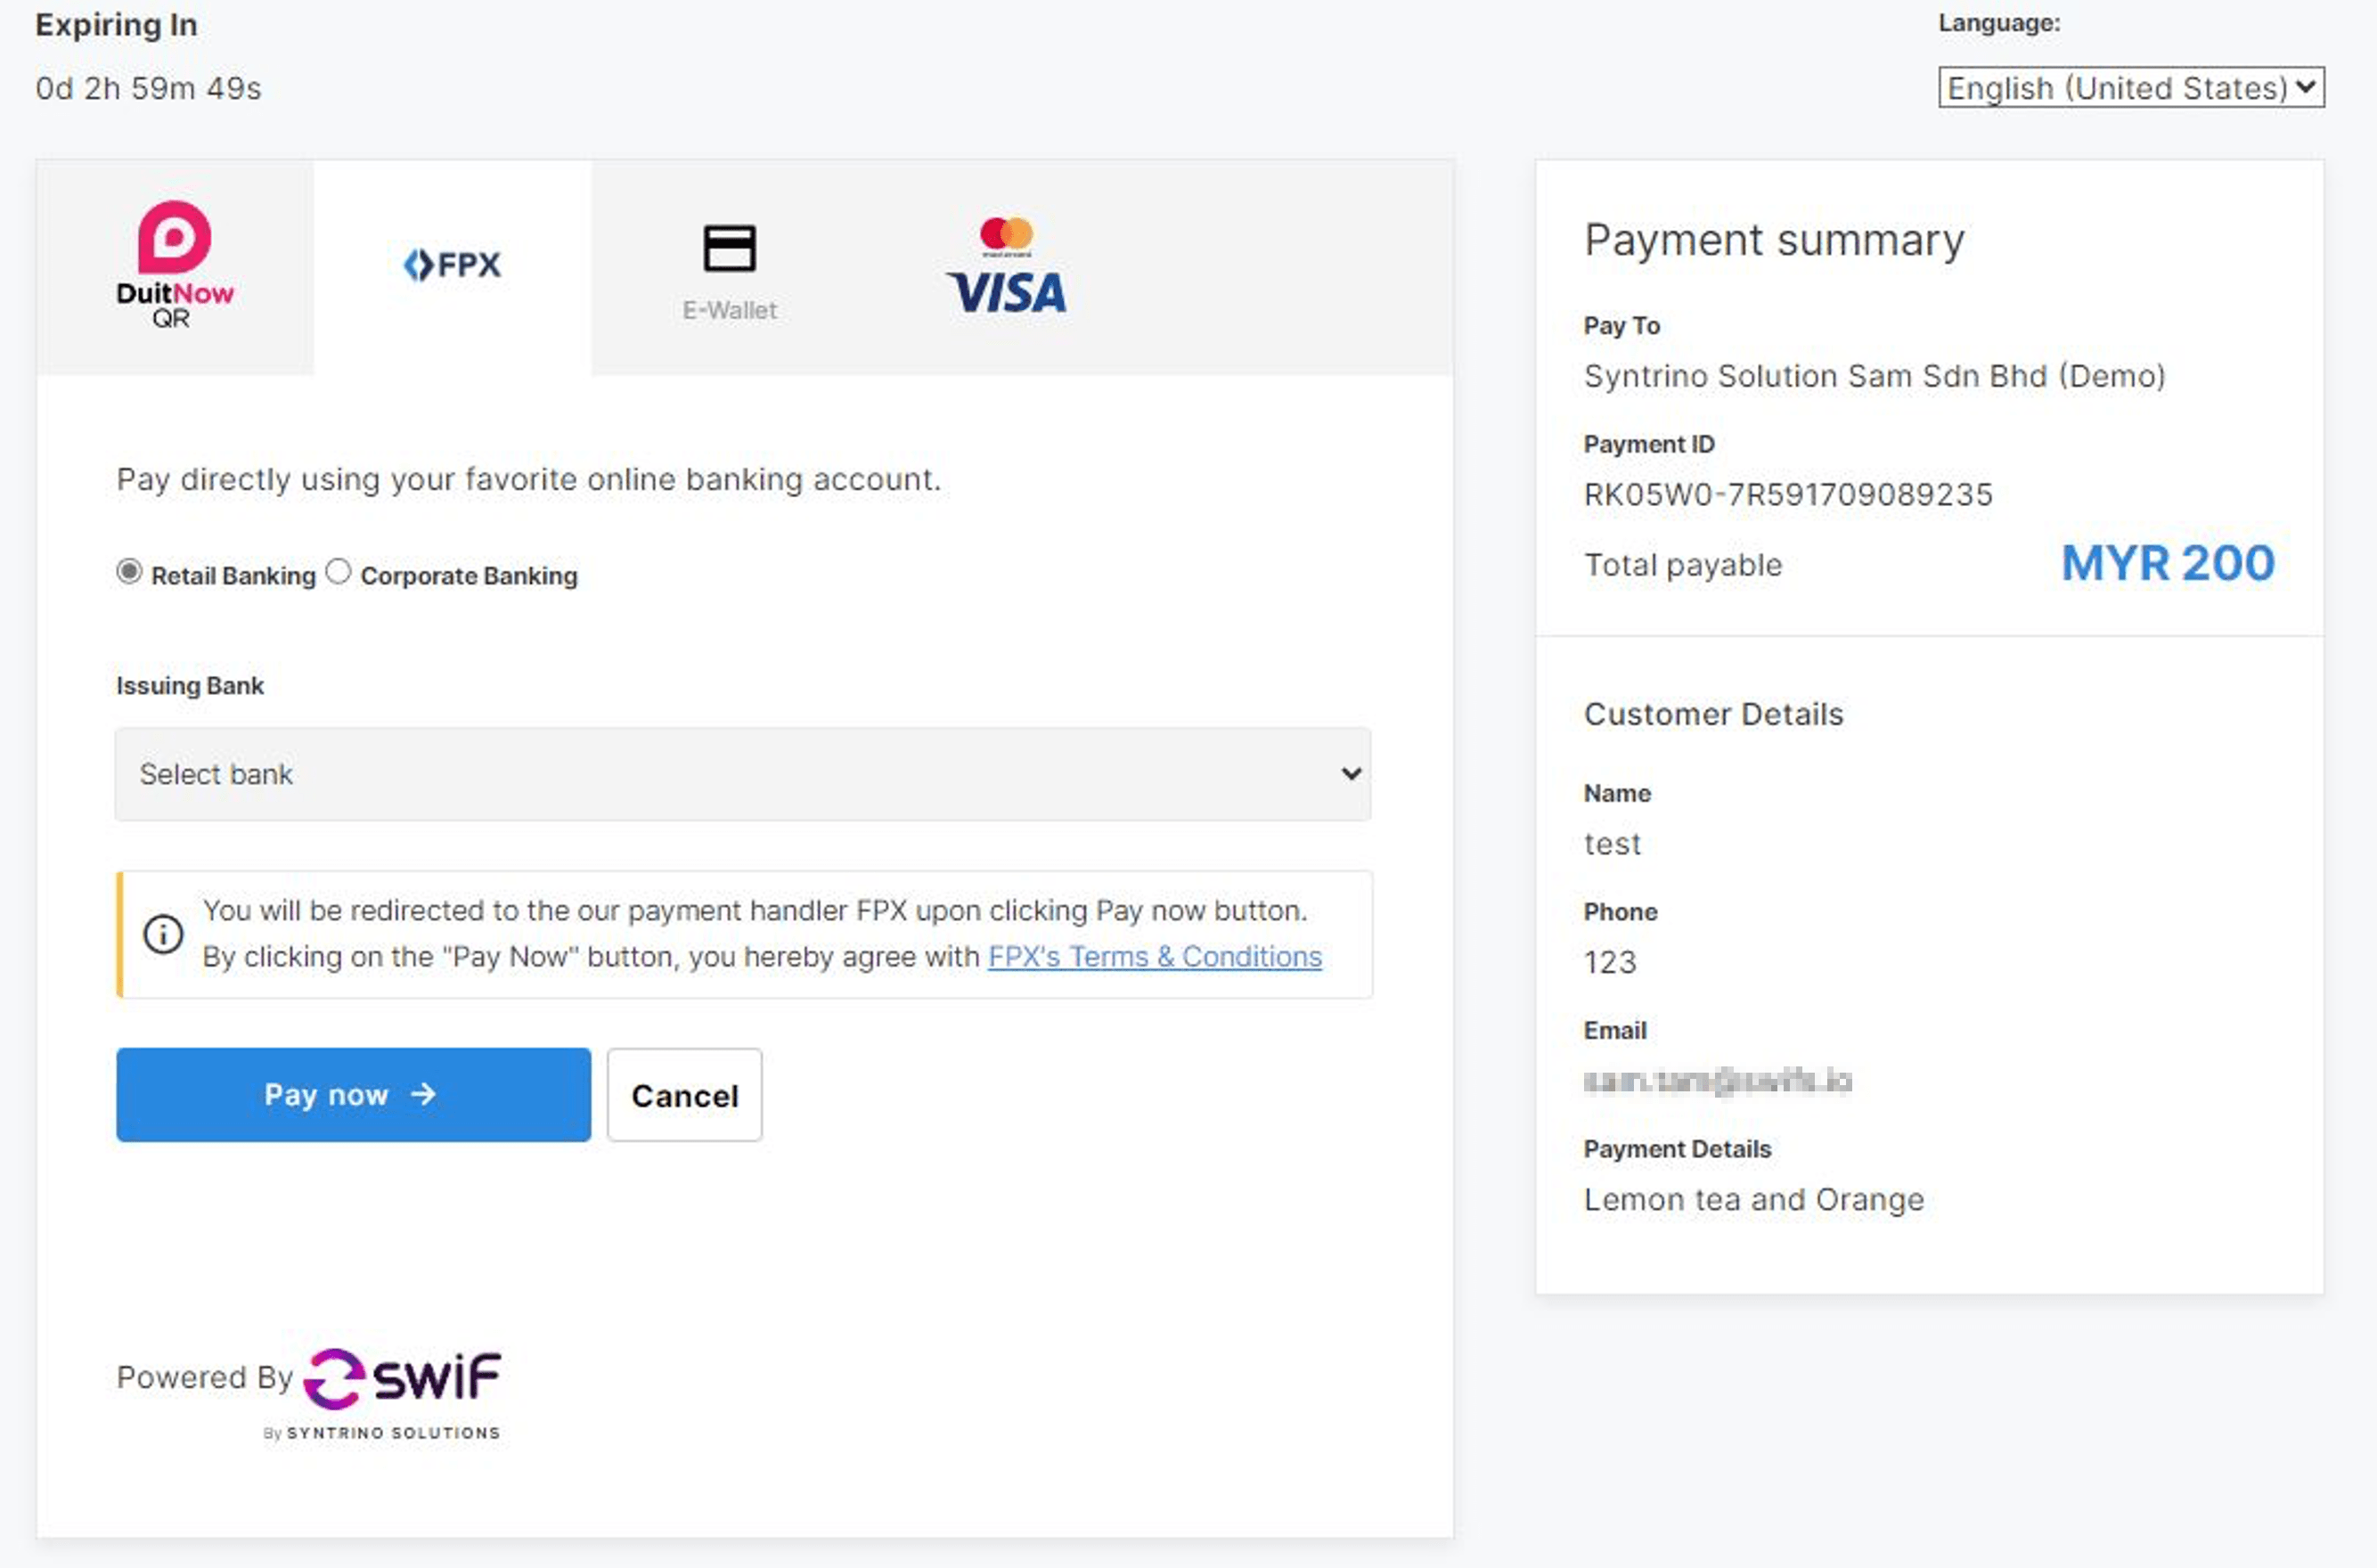
Step 4 – Customer views the invoice and payment details, then fills in their information.
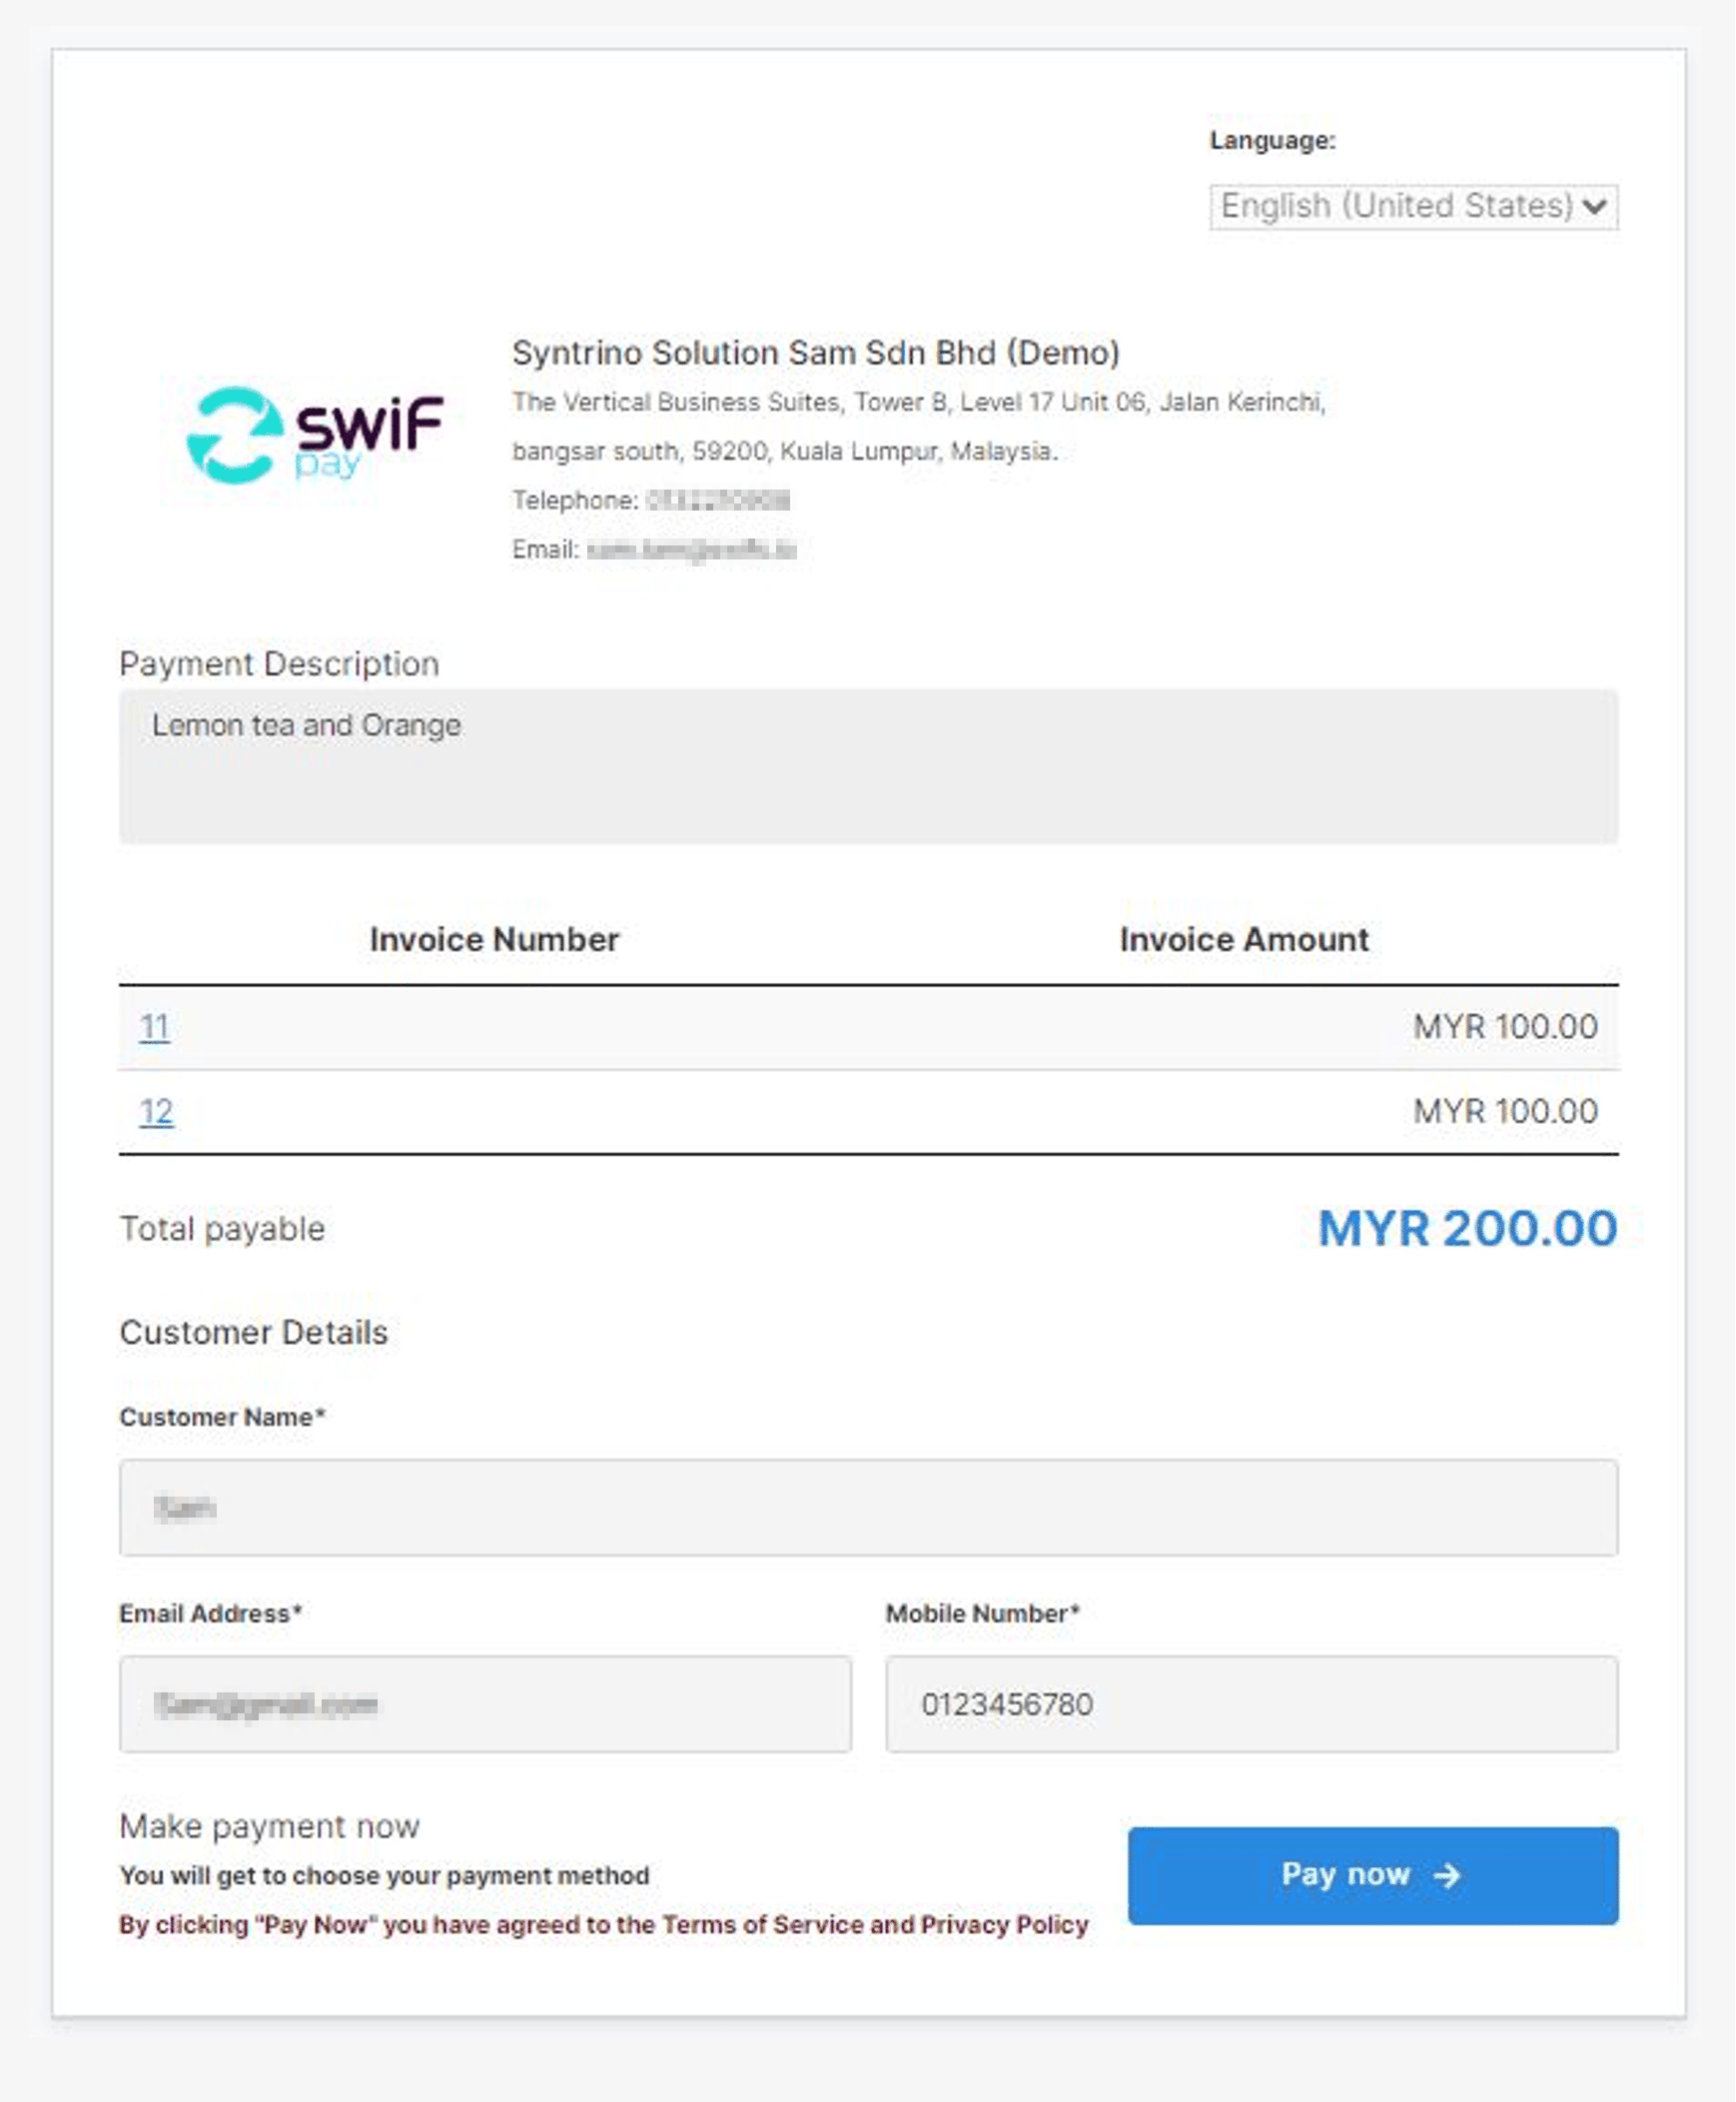
Step 5 – Customer selects their preferred payment option and proceeds with the payment.
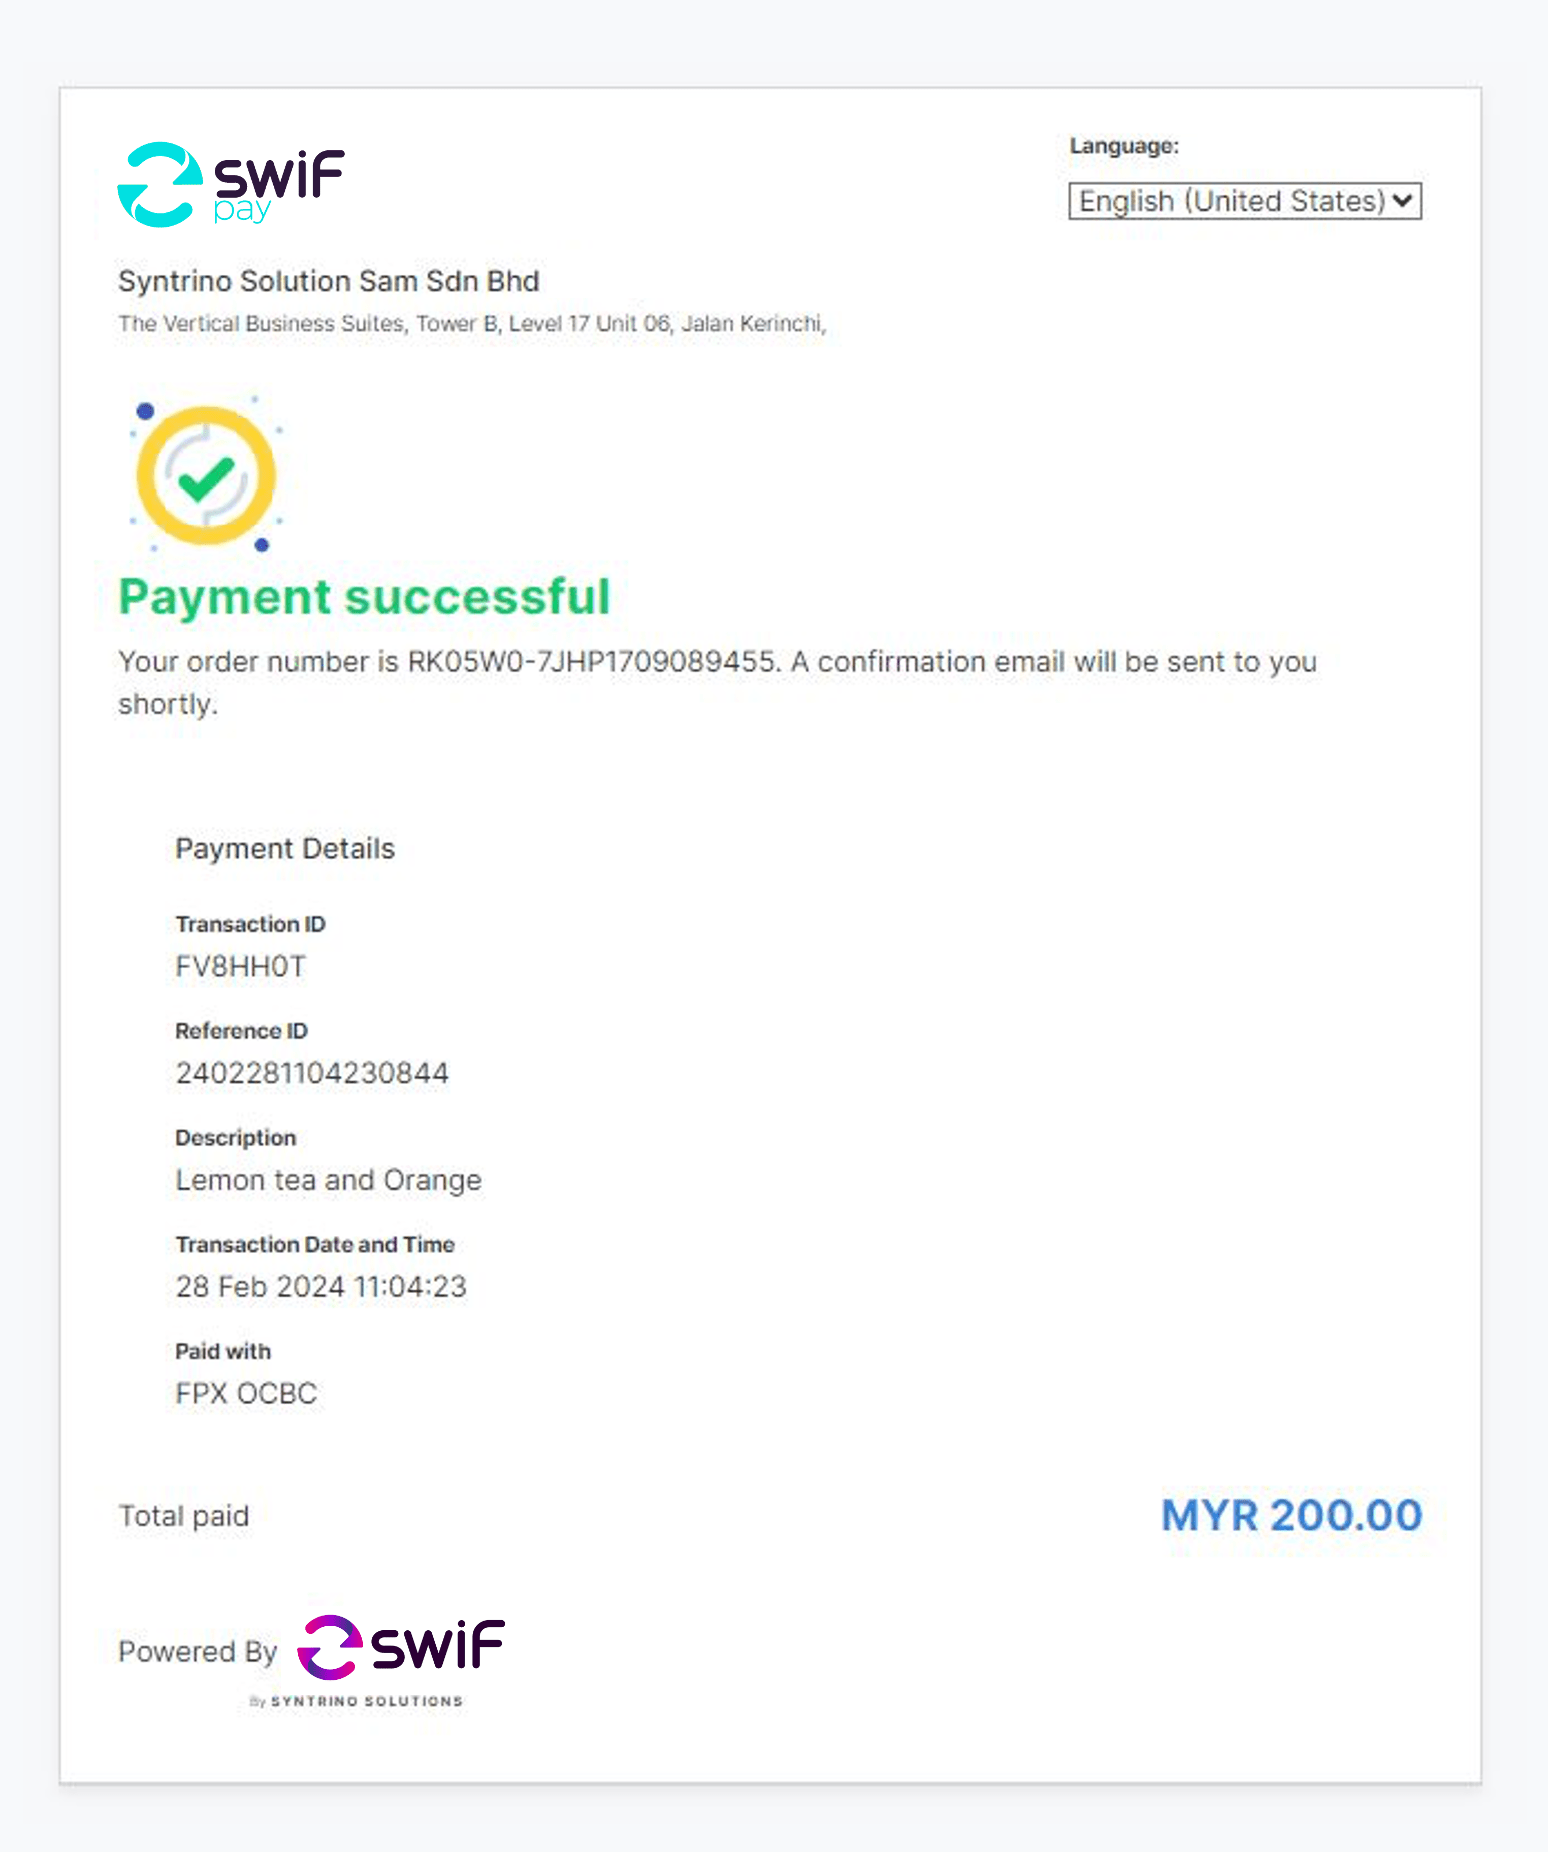
Step 6 – Customer receives notification of payment success.
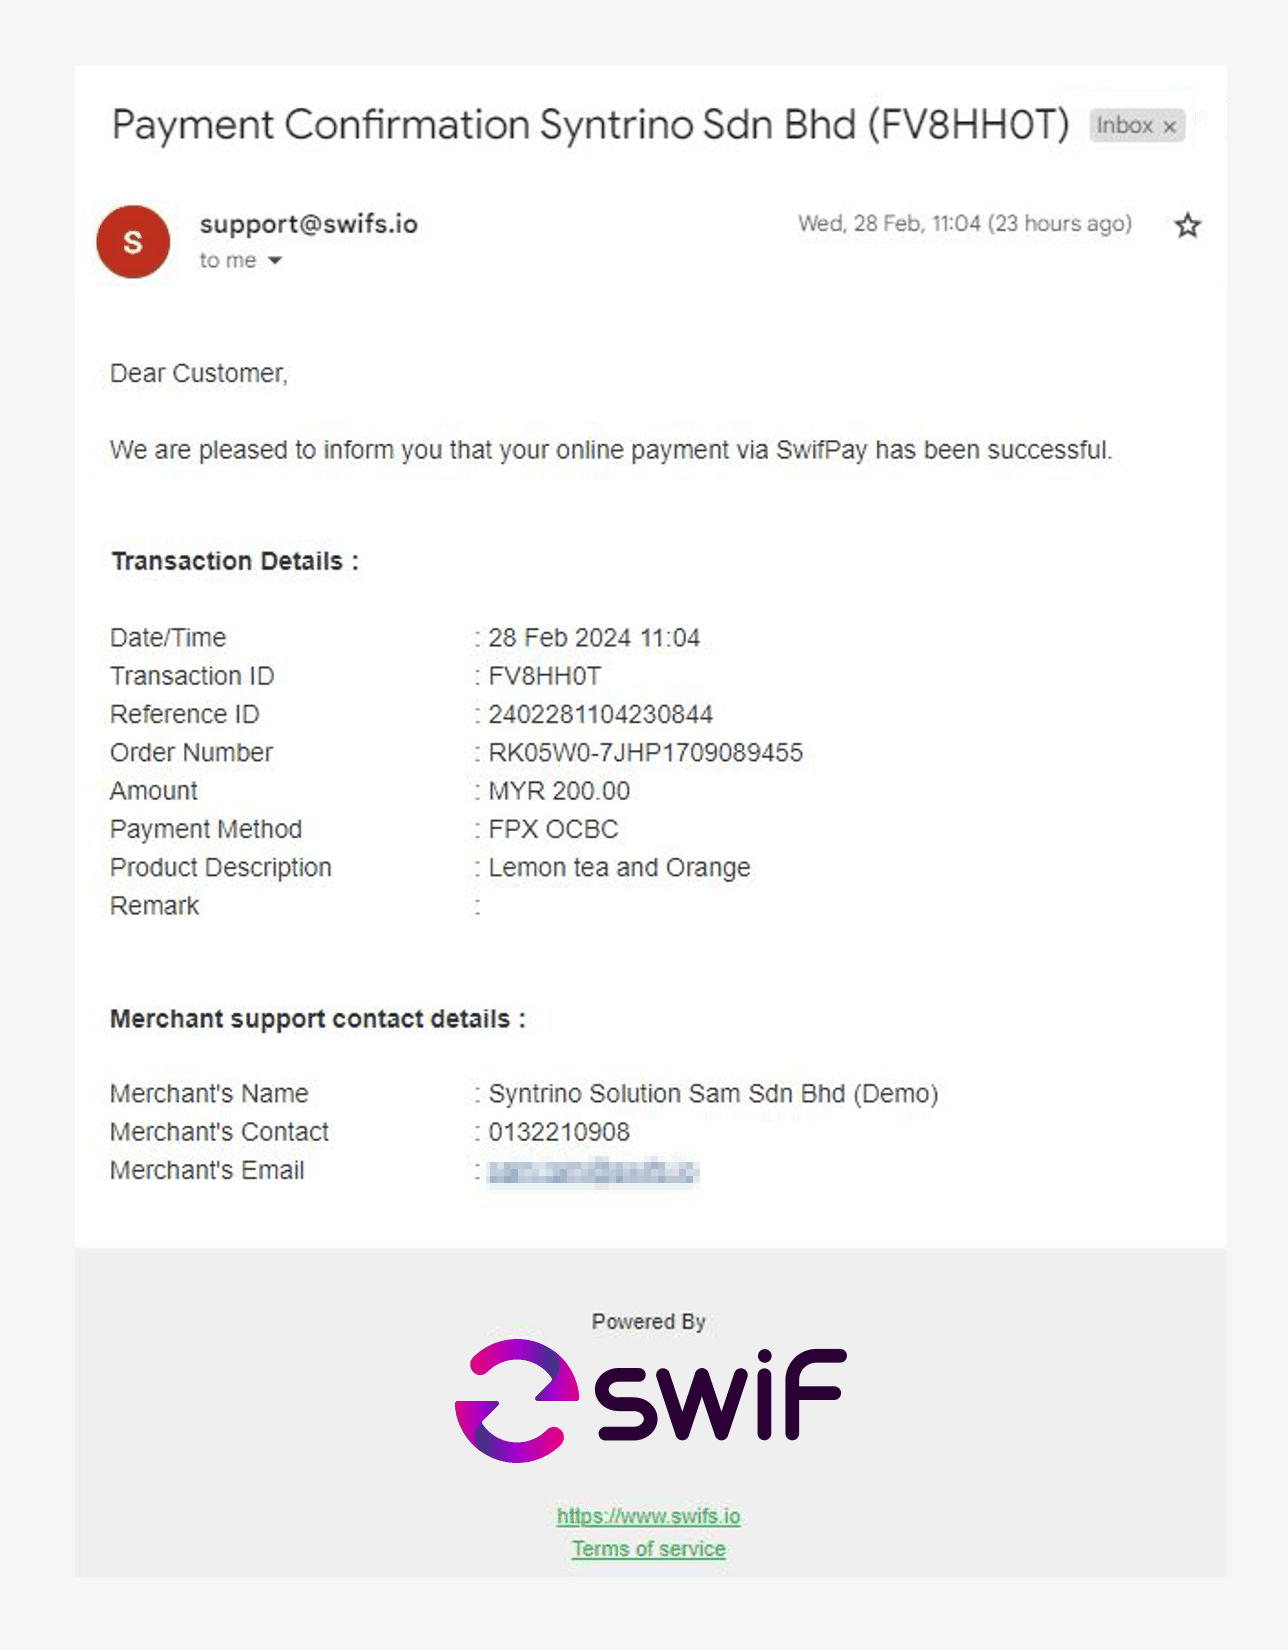
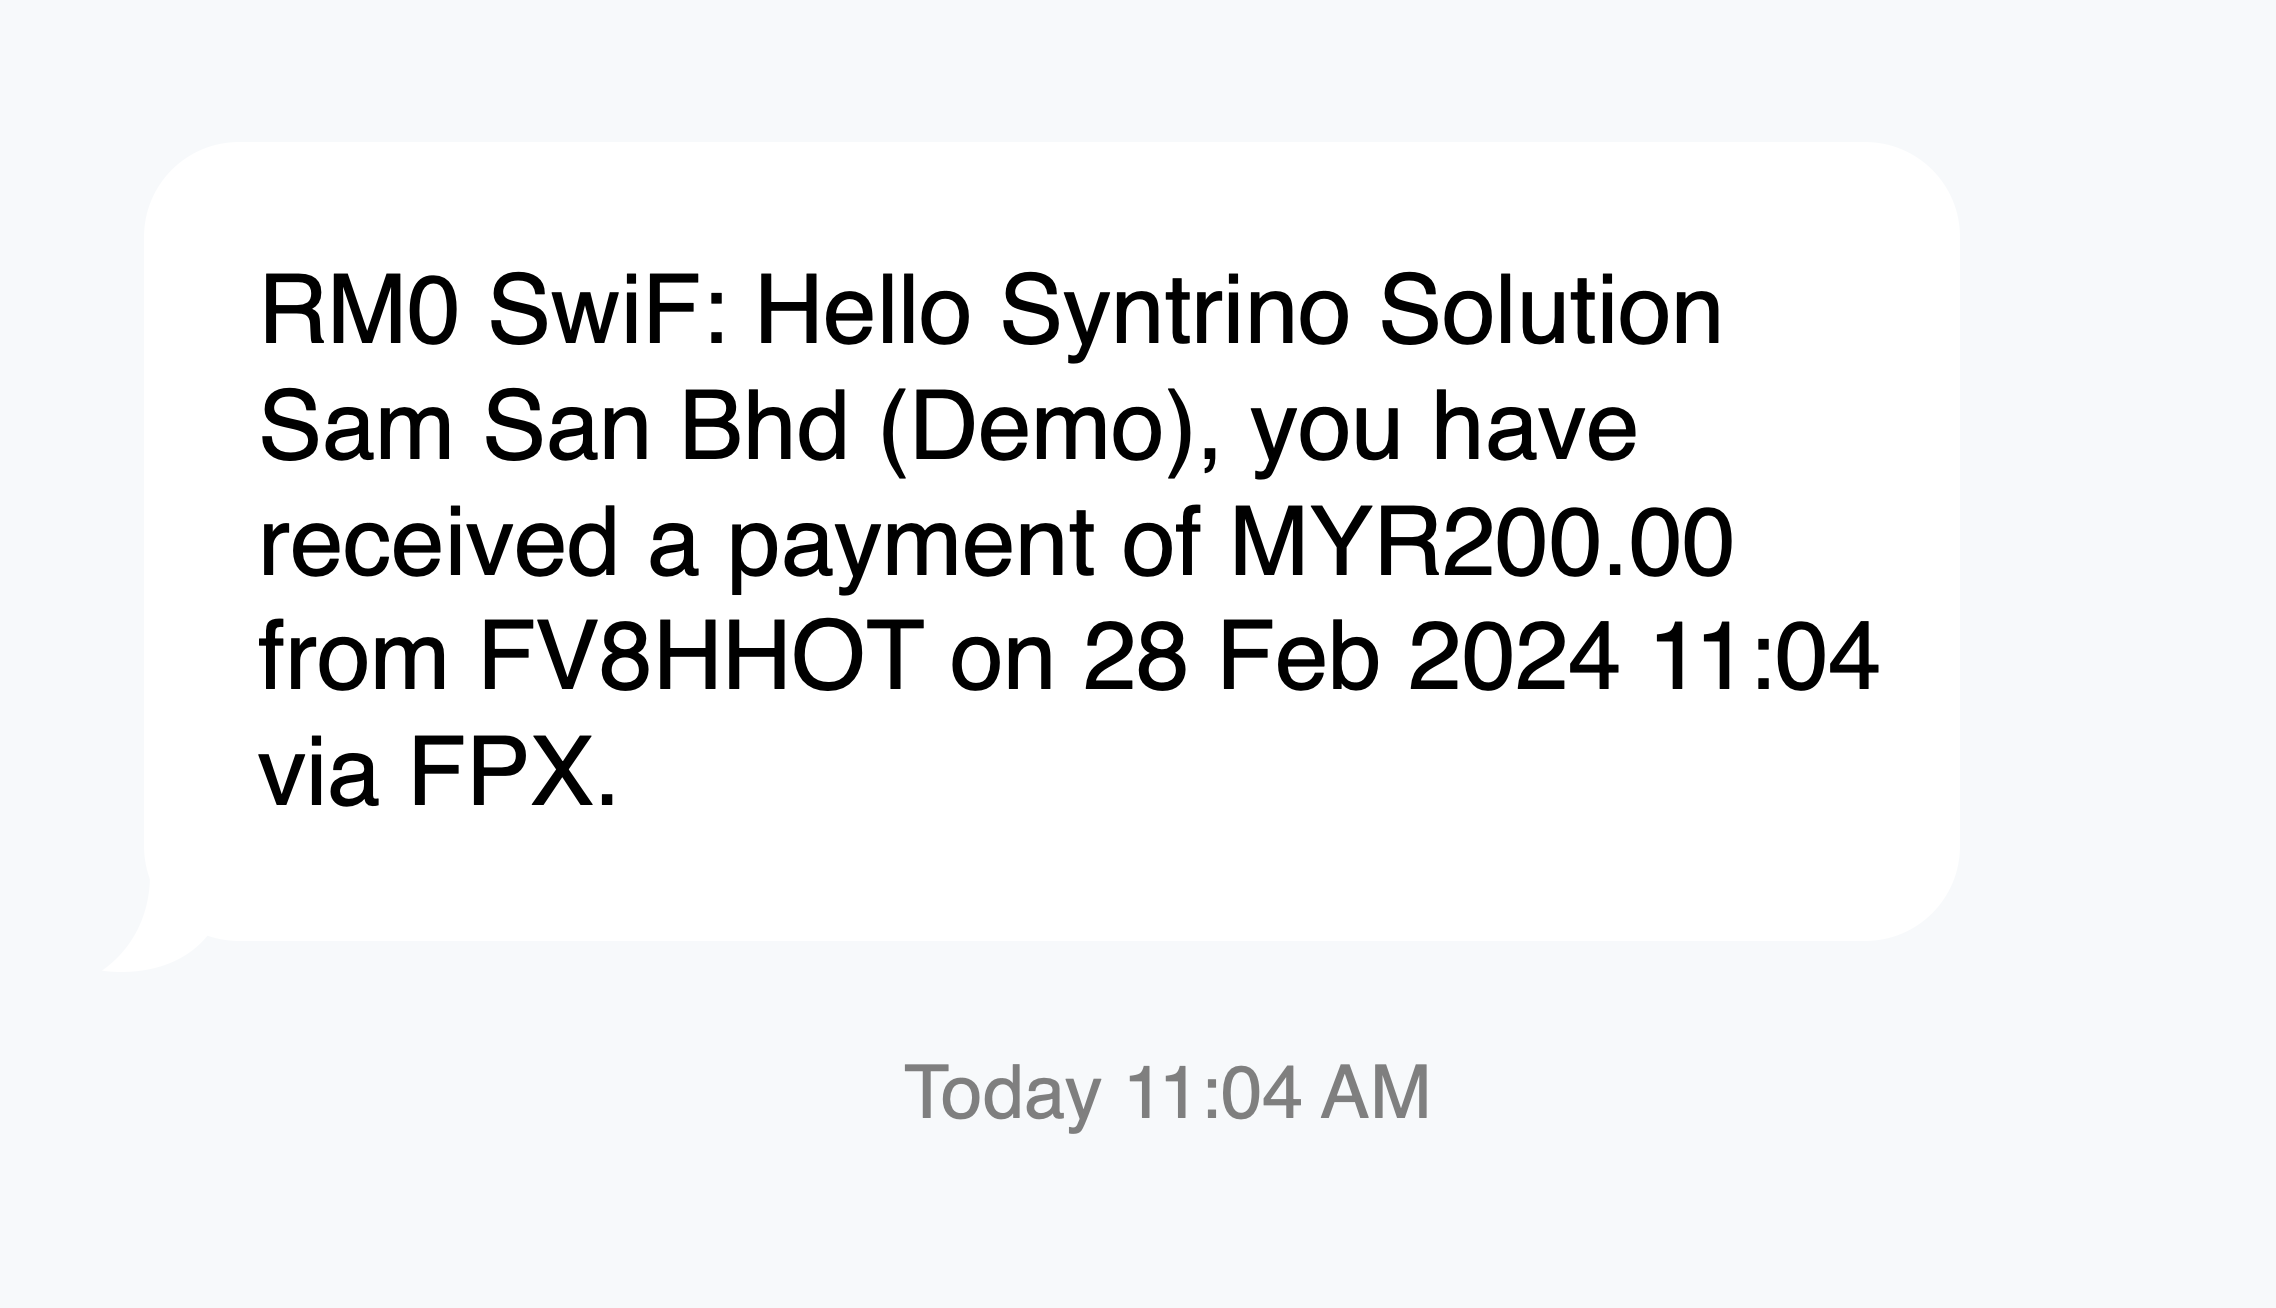
Step 7 – Merchant receives notification of payment success.
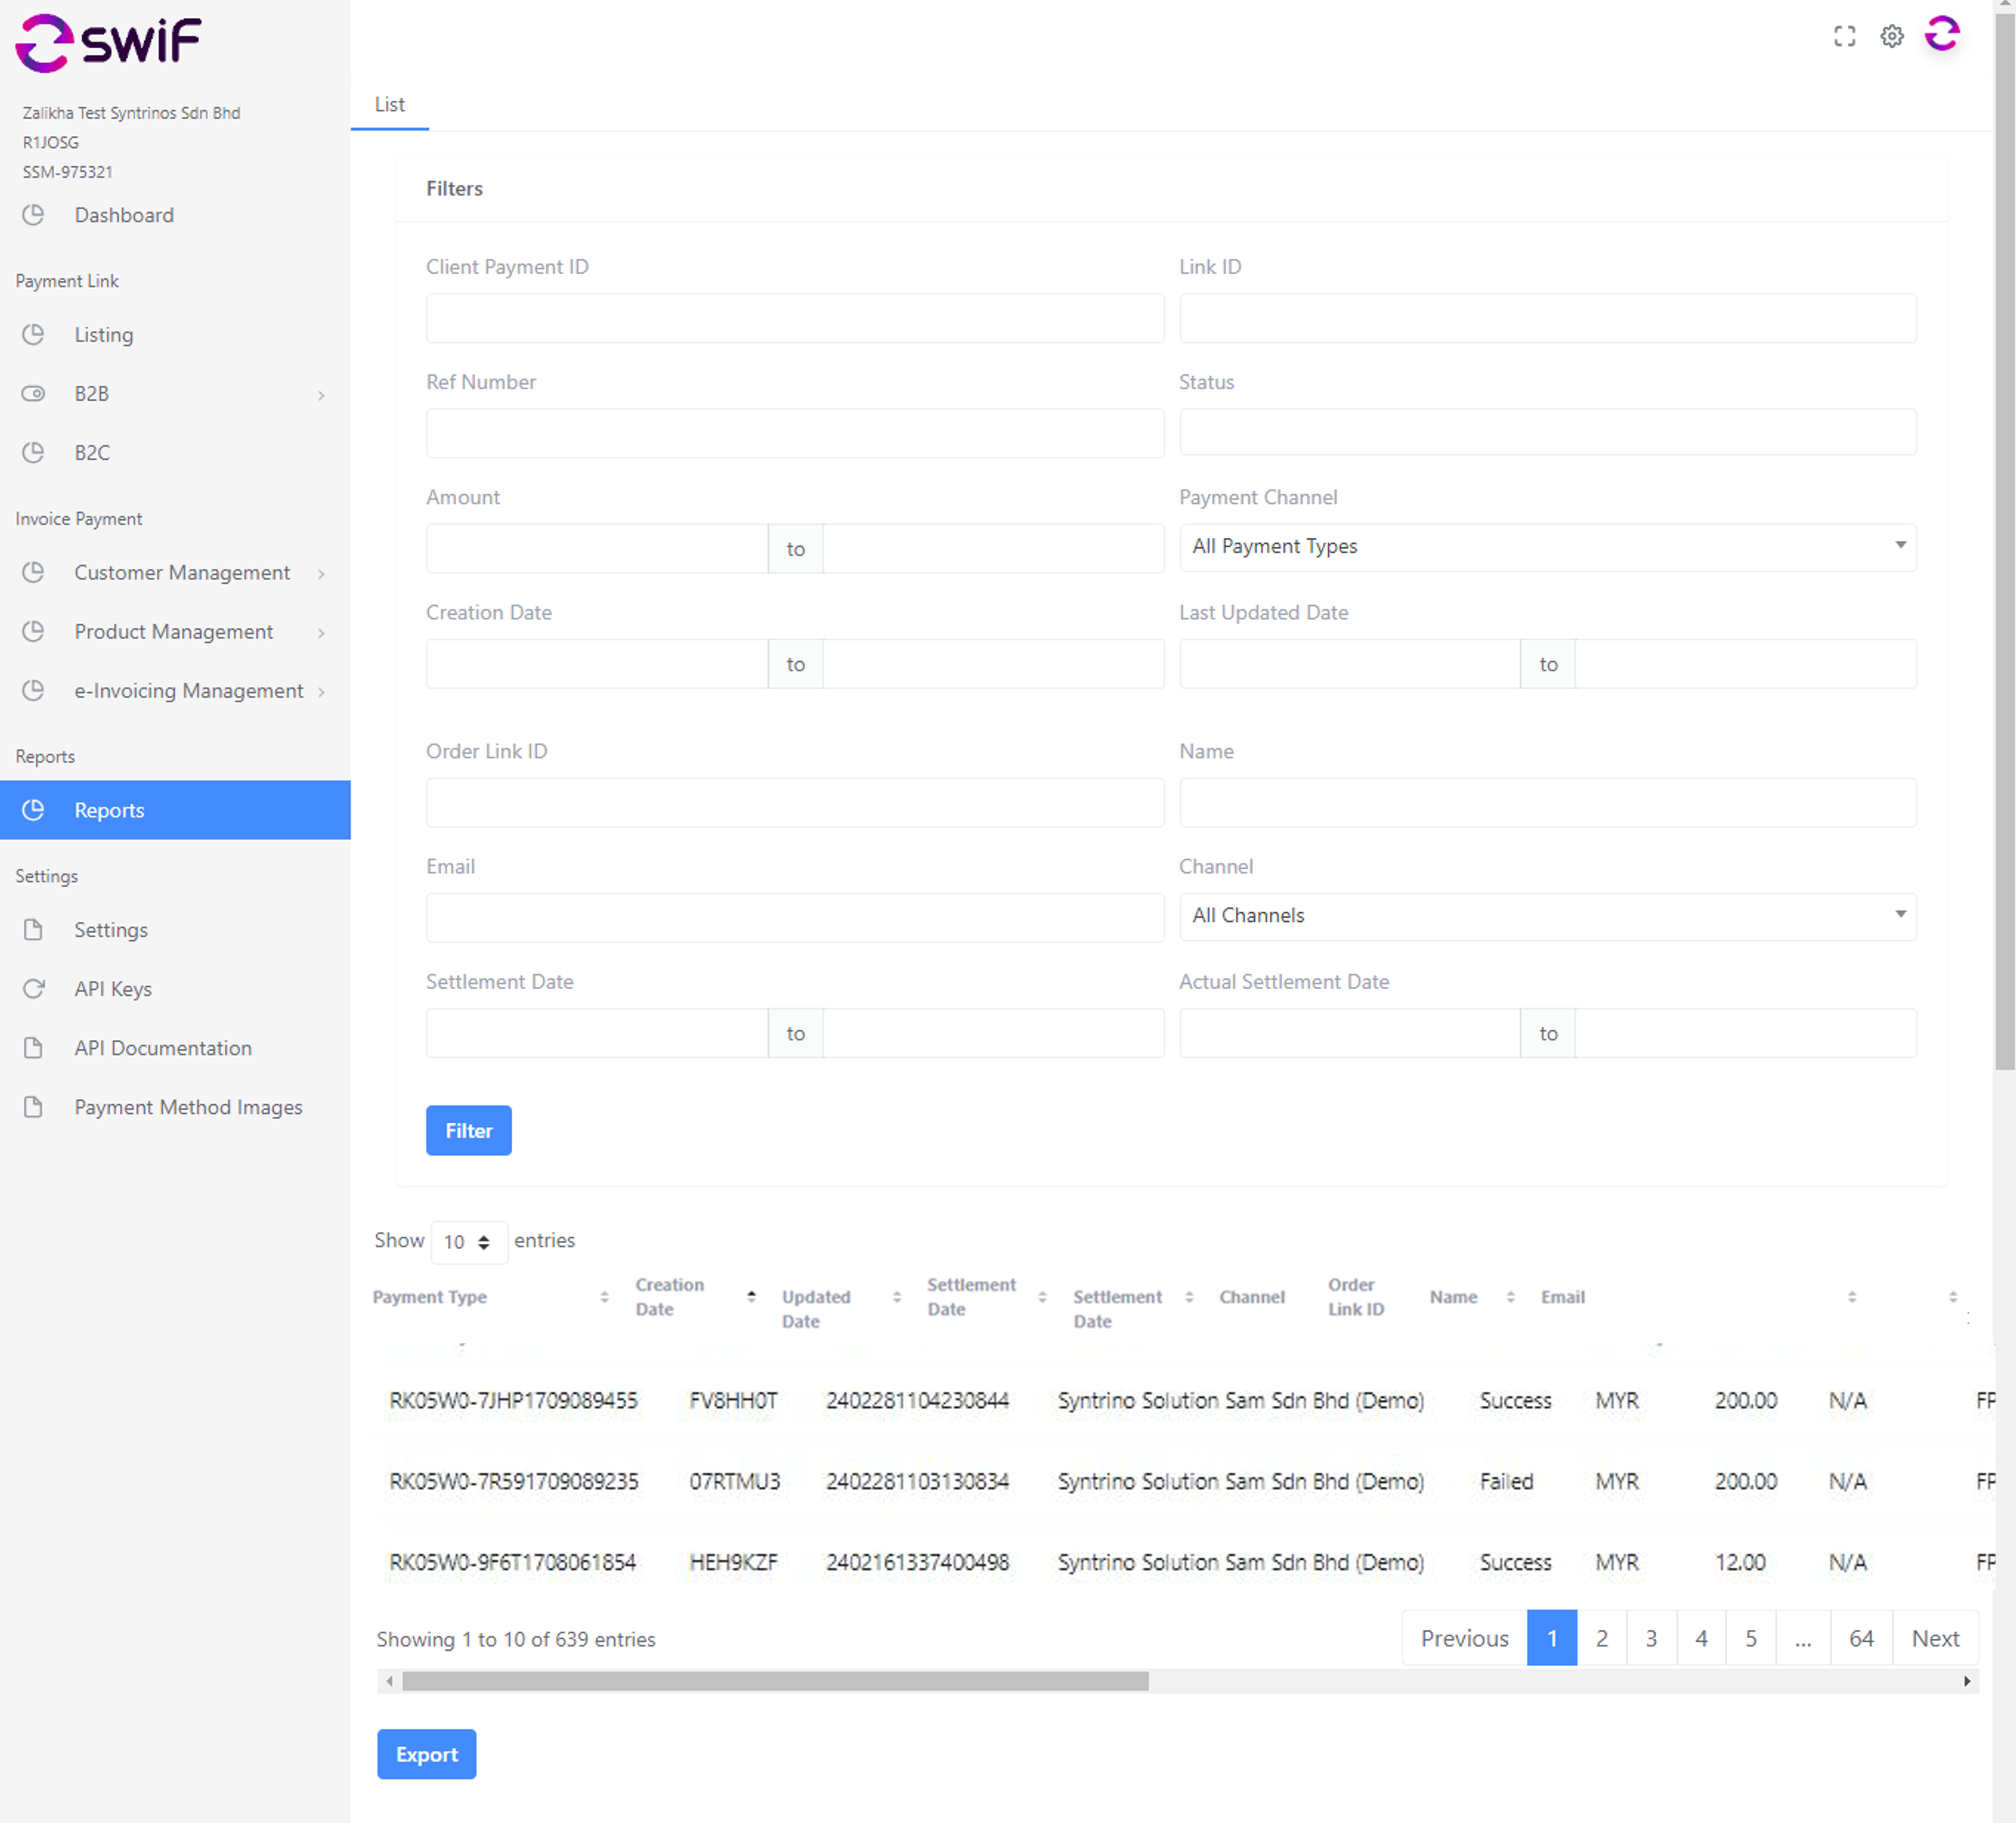
Step 8 – Merchant can keep track and access details of all transactions through the SwiF Dashboard as well as filter and download the report at any time.
Step 9 – Your customer’s payment is received in Syntrino Solutions’ account with RHB acquiring bank.
Step 10 – SwiF will transfer the payment to your bank account according to the settlement schedule. You will receive payment confirmation from your bank and a settlement report from SwiF.